Updating the Servotor32 Firmware
This guide will show you how to update the firmware on your Servotor32. If you’re not sure if you’re up to the latest version (2.0), you should check the firmware version first.
1
Install Servotor32 Board and Library
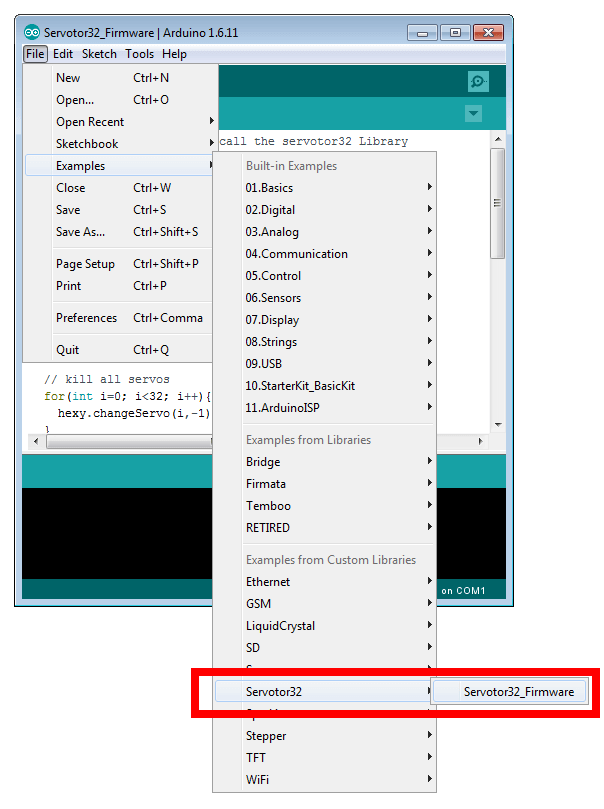
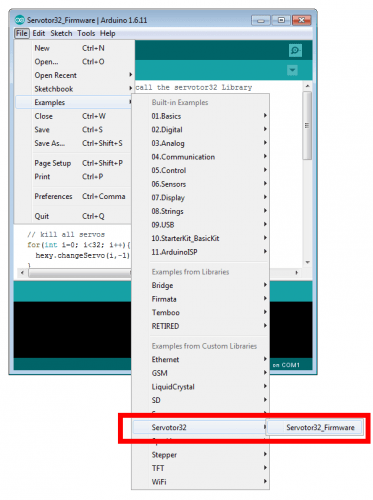
Here we are selecting the Servotor32 Default Firmware example. This is the code that PoMoCo 2 needs on the Servotor32 in order to be able to talk with it.
You can select it from File > Examples > Servotor32 > Servotor32_Firmware
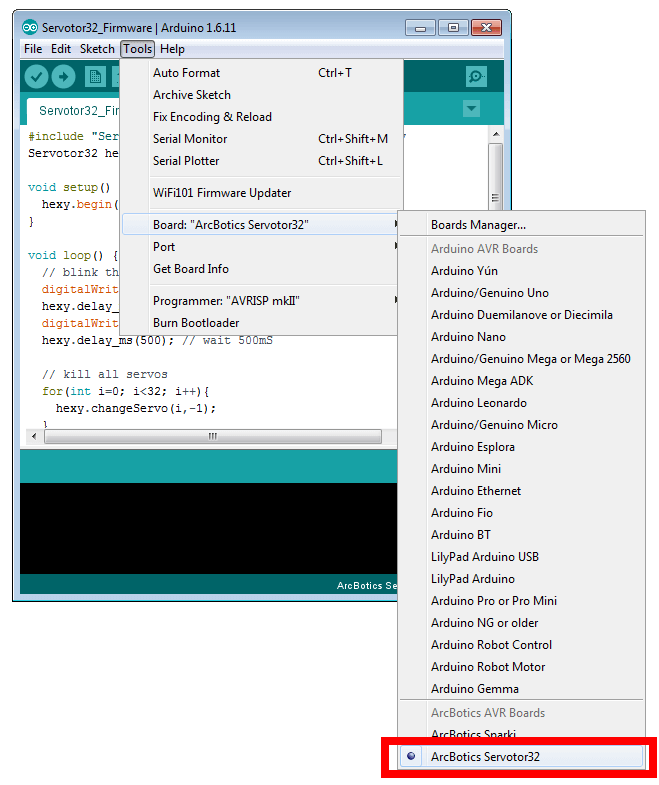
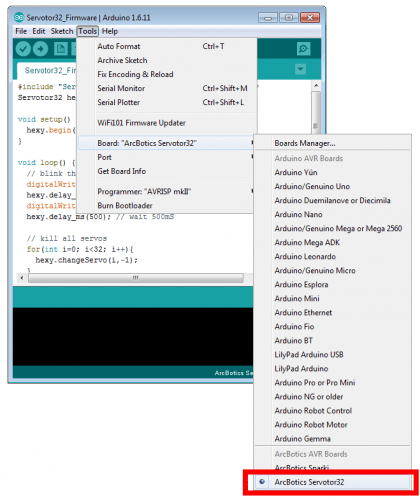
Select the Servotor32 board option from the menu Tools > Board > ArcBotics Servotor32
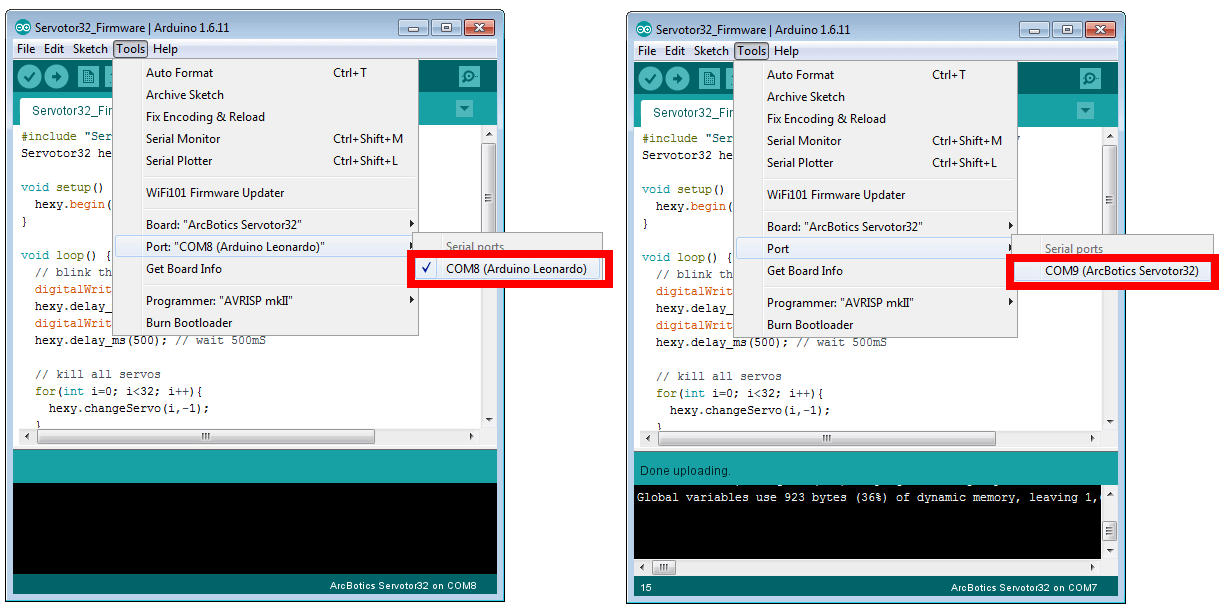
Select the Servotor32’s serial port for the Servotor32 from the menu Tools > Port.
It should say ‘Arduino Leonardo’ or ‘ArcBotics Servotor32’ on the right if you are using the latest version of Arduino. If you don’t see this port, try plugging the board back in, re-installing PoMoCo, or installing just the driver.
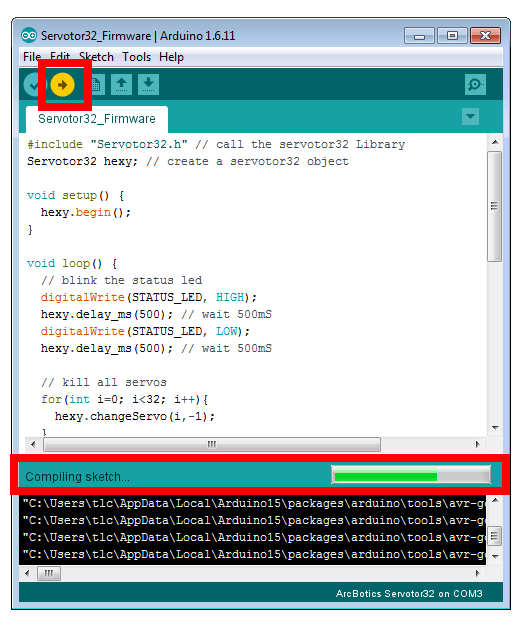
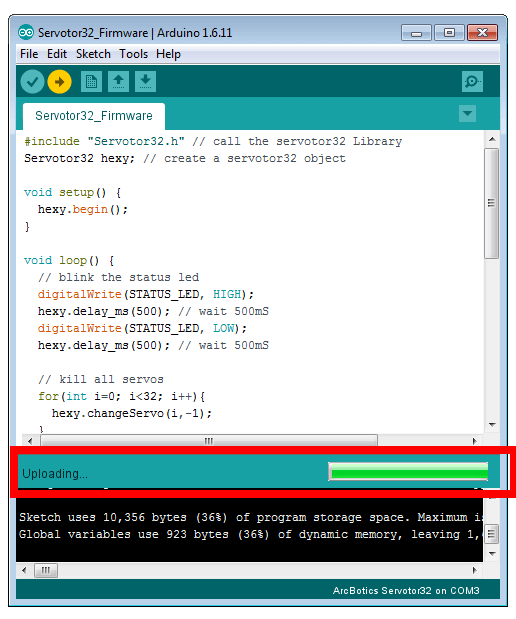
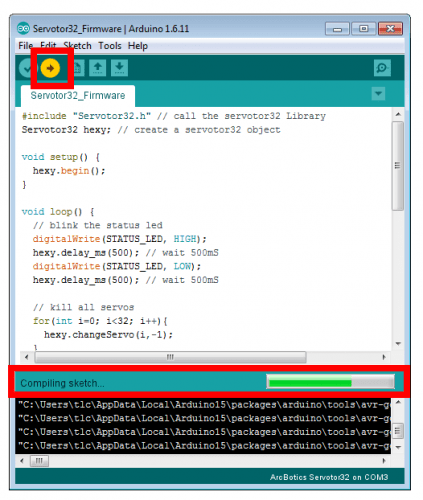
Upload the firware by pressing the Upload button highlighted in the picture below.
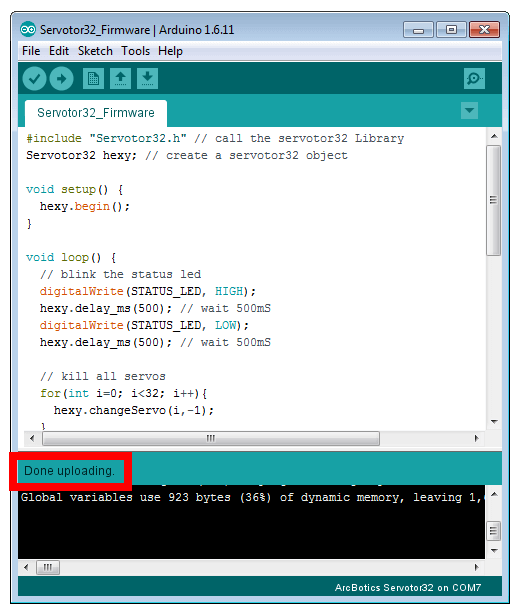
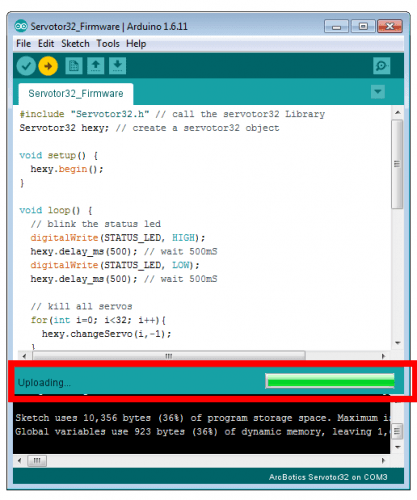
The IDE at the bottom should say ‘Compiling‘, then ‘Uploading‘, then ‘Done Uploading‘.
The board should blink rapidly, turn solid red, then run the code.
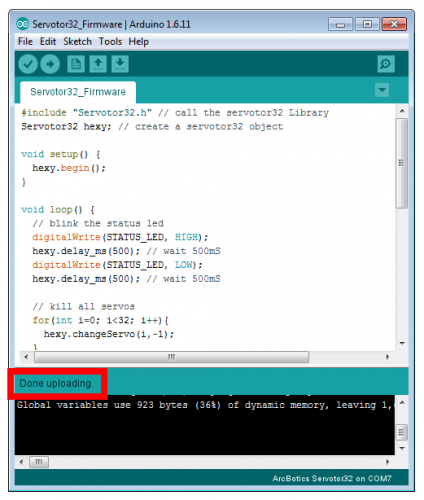
If the board doesn’t upload, re-check your board and port settings. If you have further issues, try holding the reset button in the center of the board until ‘uploading’ is shown, then immediately release it.
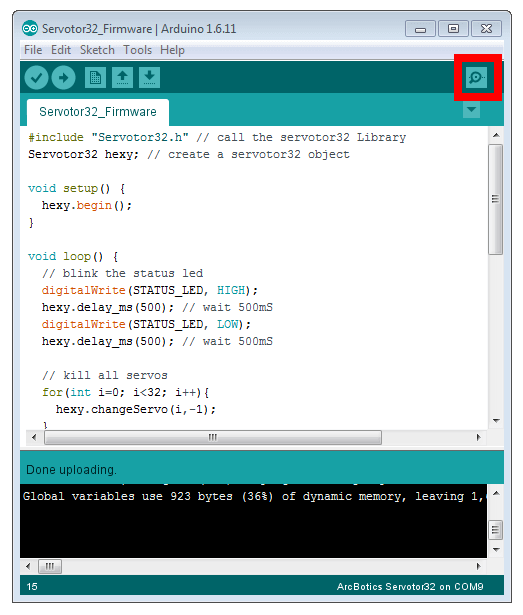
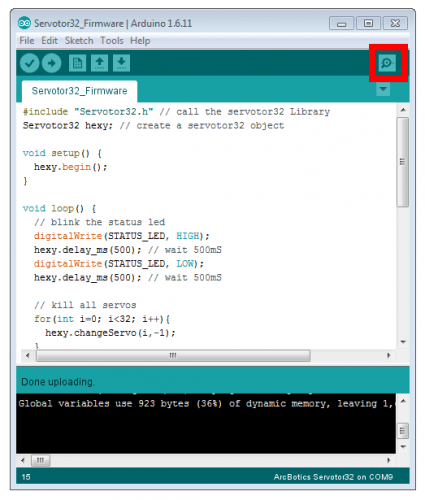
Click on the Serial Monitor in the upper right-hand corner of the Arduino IDE to talk to the board – make sure the serial port is selected first:
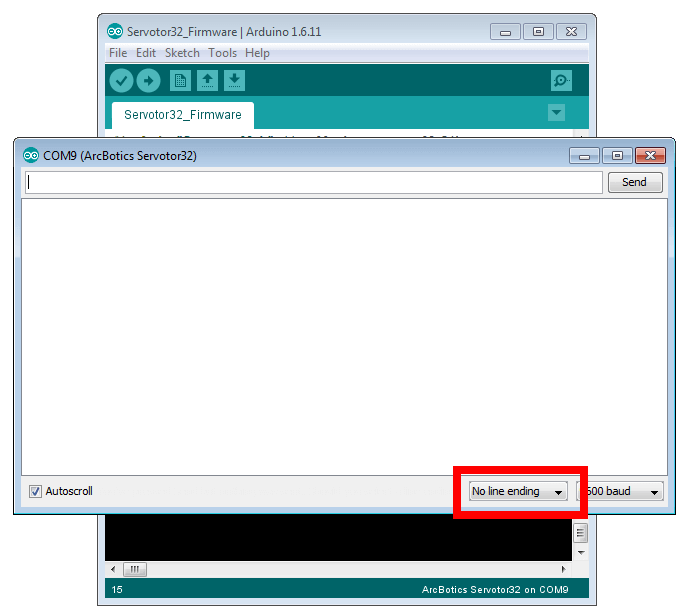
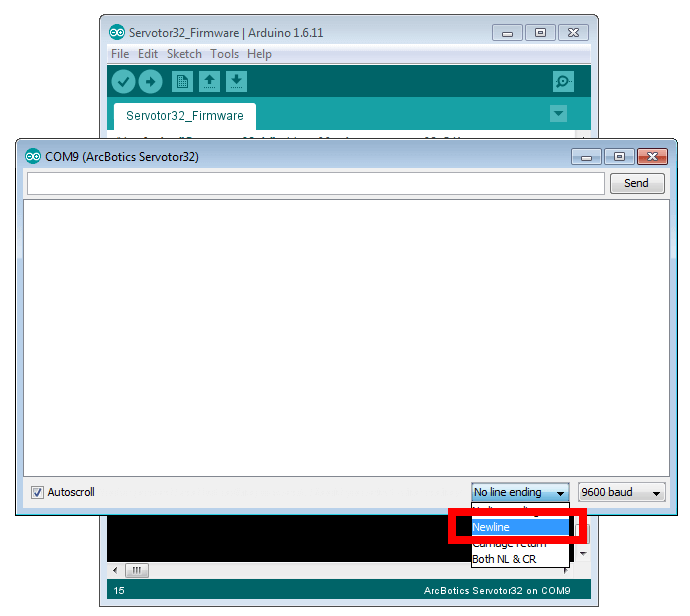
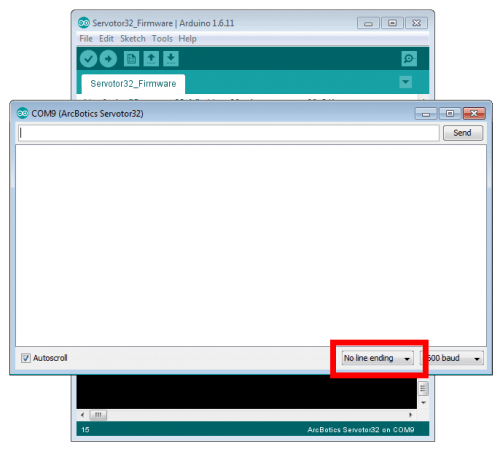
With the Serial Monitor Open, select newline from the line ending slection box at the bottom of the Serial Monitor windows
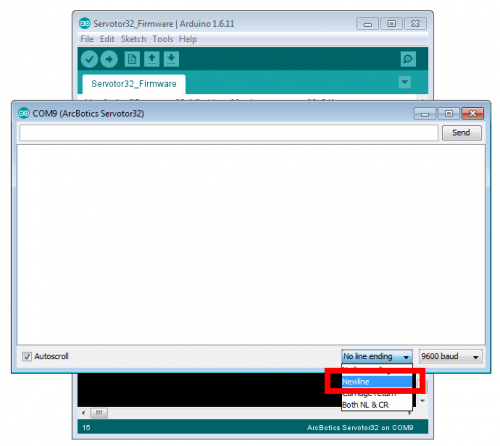
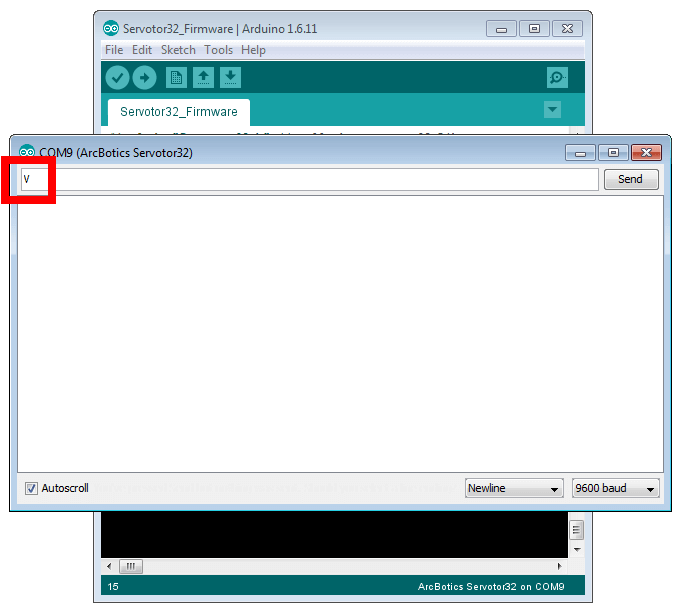
With ‘newline’ selected, type the capital letter V into the box on top and press enter.
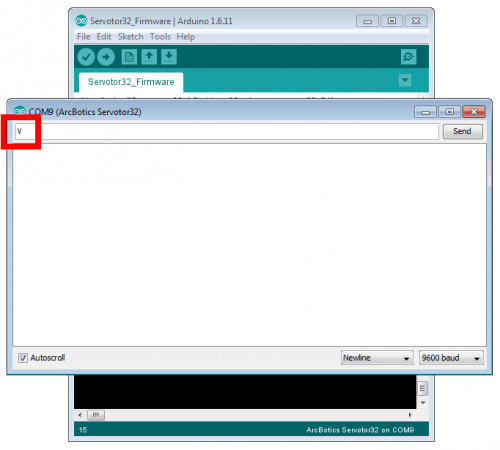
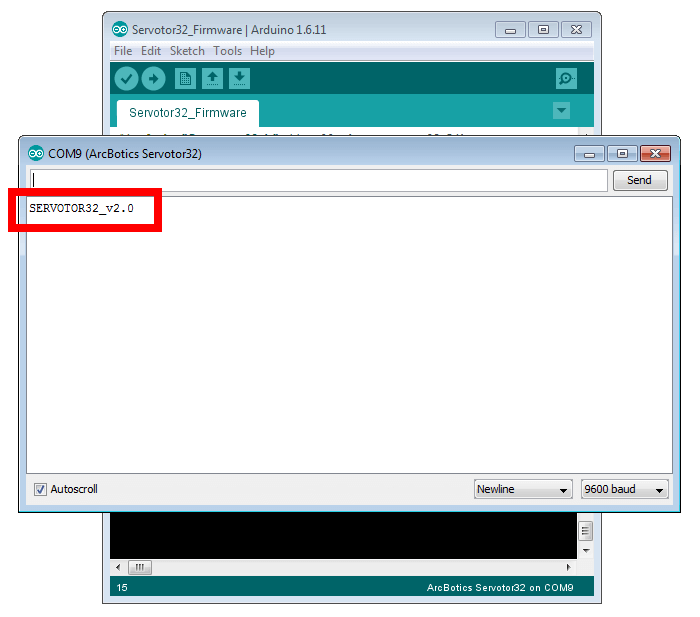
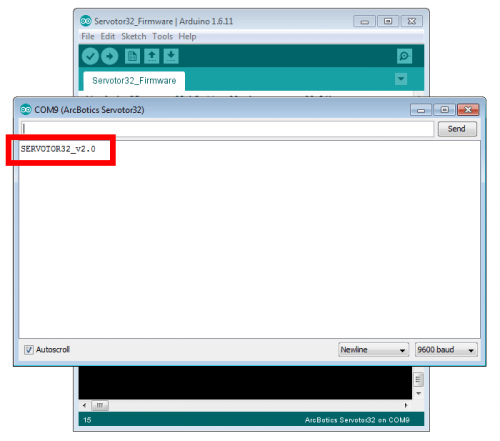
The board should reply back with its firmware version.
If you see the response below (SERVOTOR32_v2.0), it’s a success!
7
Run Moves with PoMoCo 2
With the firmware succesfully updated, you’re ready to run and write moves with PoMoCo 2
Using PoMoCo 2