Installing the Servotor32 Board and Library
Install Arduino for Windows
Download and install the latest version of Arduino for your Windows:
Install the Library and Board for Sparki
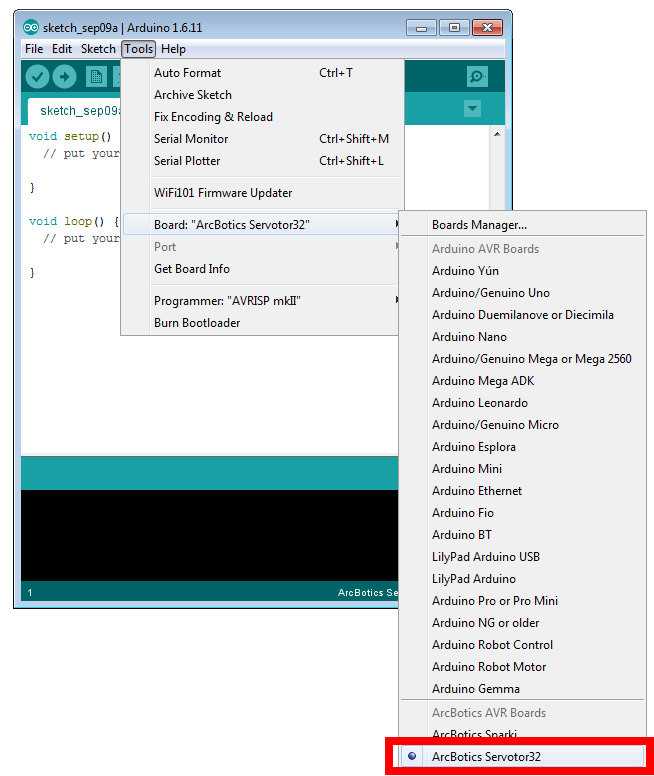
To use the Servotor32, Arduino needs to know a little about it. So, we need to add Servotor32 as a new “board” type.
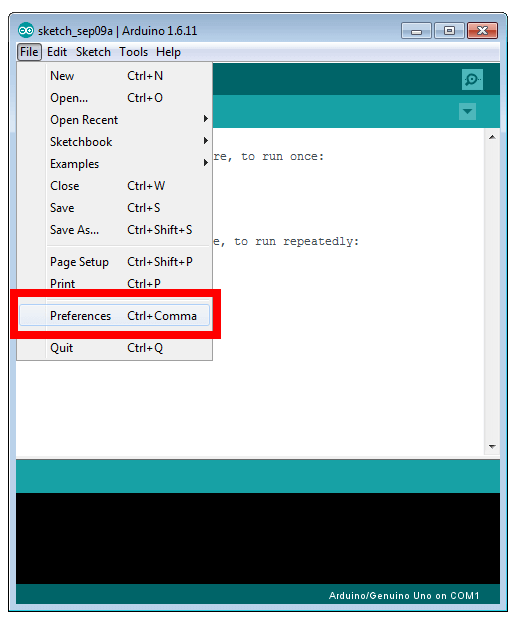
After you have downloaded and installed v1.6.4 or later, you will need to start Arduino and navigate to the Preferences menu. You can access it from the File menu.
A dialog will pop up just like the one shown below.
We will be adding a URL to the new Additional Boards Manager URLs option.
We will only need to add one URL to the IDE in this example. Copy and paste the link below into the Additional Boards Manager URLs option in the Arduino preferences.
https://raw.githubusercontent.com/ArcBotics/ArcBotics-Boards/master/package_arcbotics.com_boards_index.json
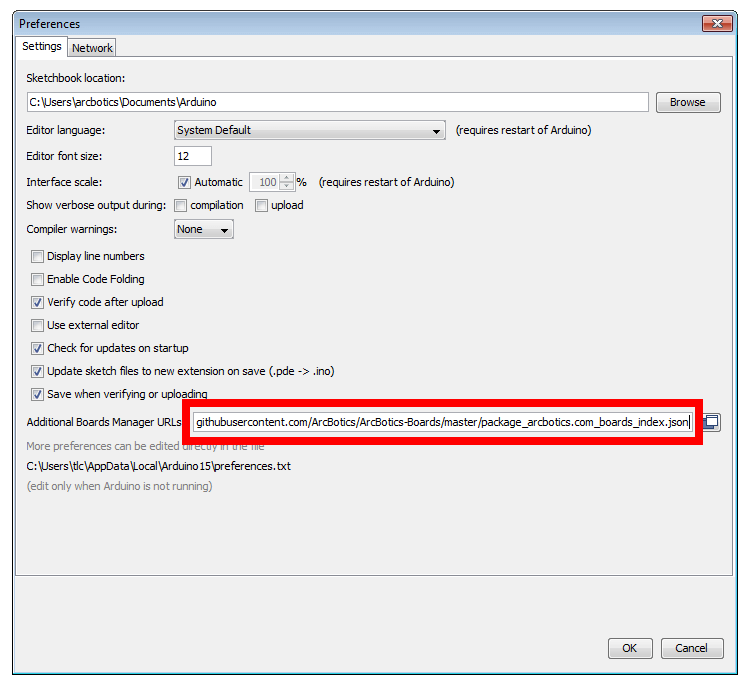
Once done click OK to save the new preference settings.
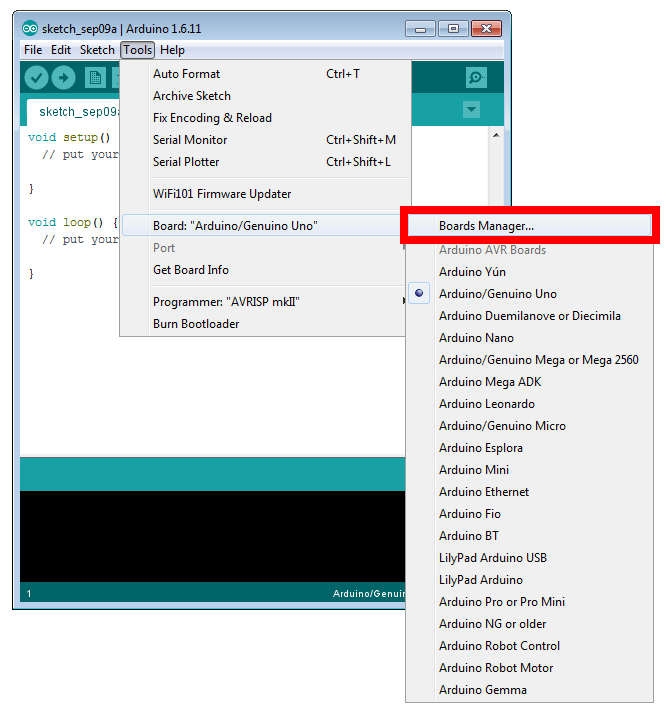
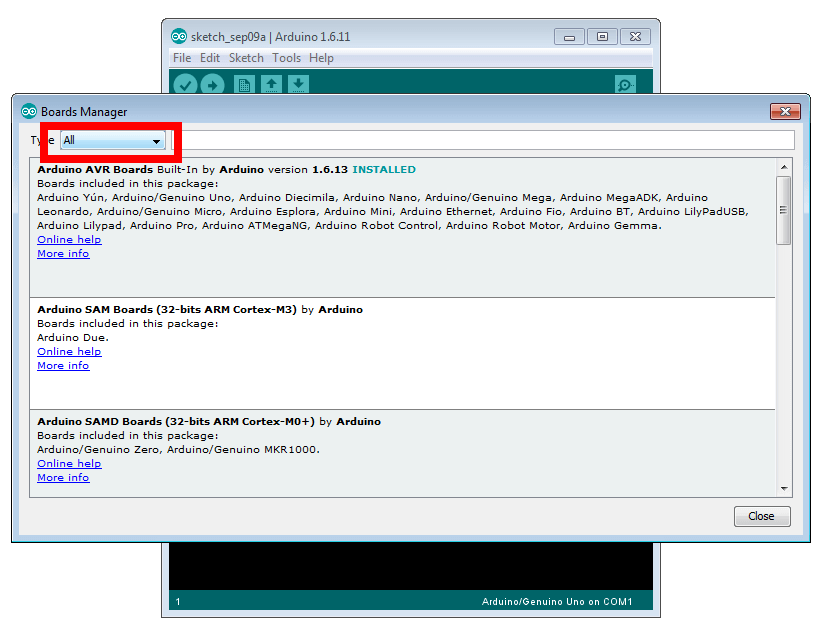
Now that you have added the appropriate URLs to the Arduino IDE preferences, you can open the Boards Manager by navigating to the Tools->Board menu.
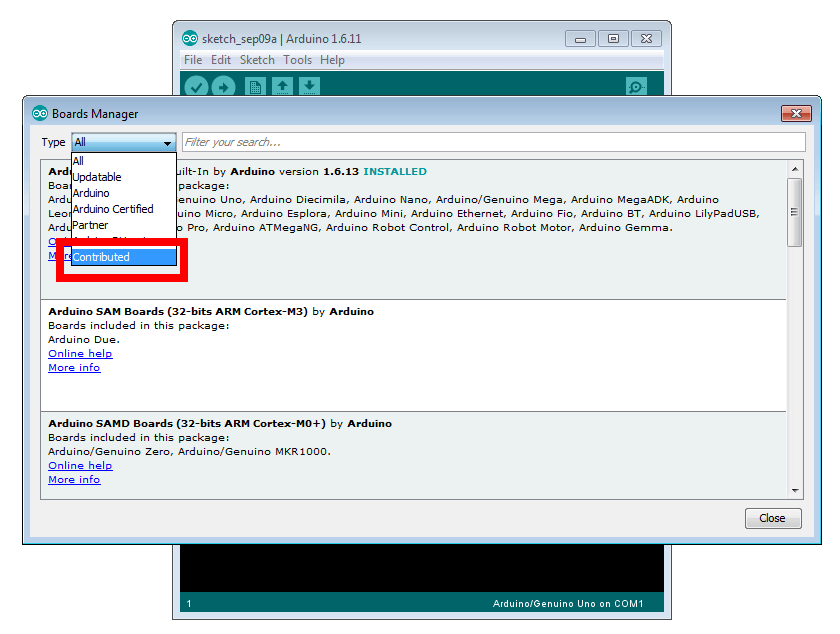
Once the Board Manager opens, click on the category drop down menu on the top left hand side of the window and select Contributed. You will then be able to select and install the boards supplied by the URLs added to the prefrences.
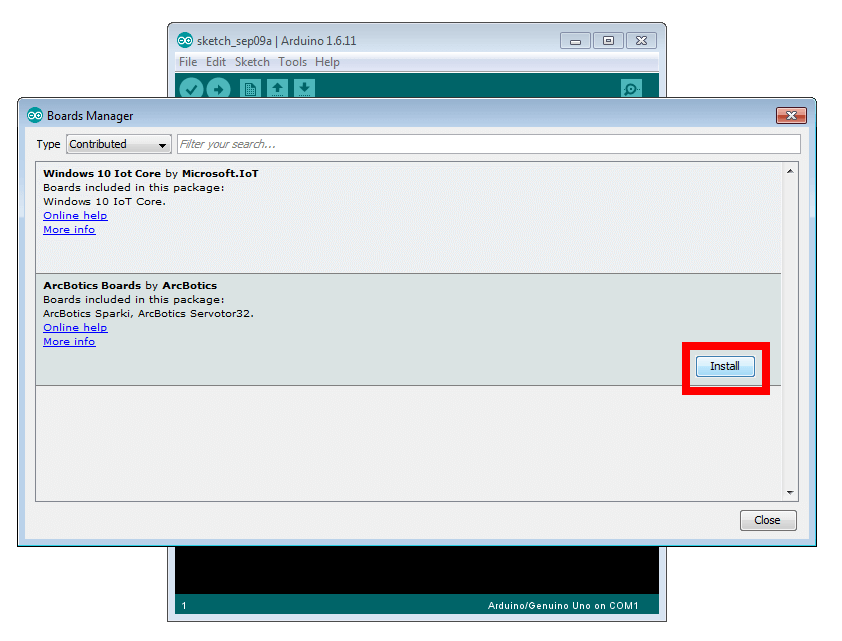
Click Install, and the appropriate board files and libraries will be installed for you:
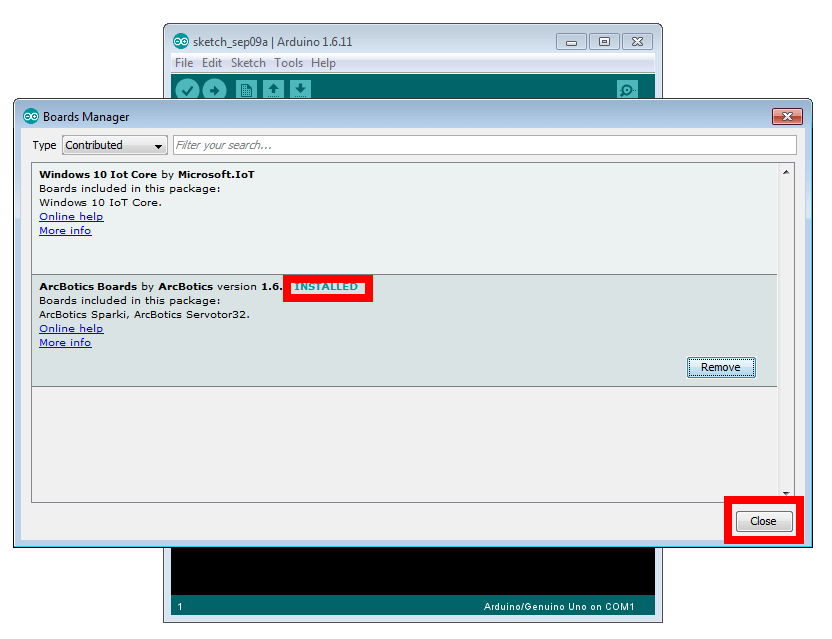
Next, quit and reopen the Arduino IDE to ensure that all of the boards are properly installed. You should now be able to select and upload to the new boards listed in the Tools->Board menu.
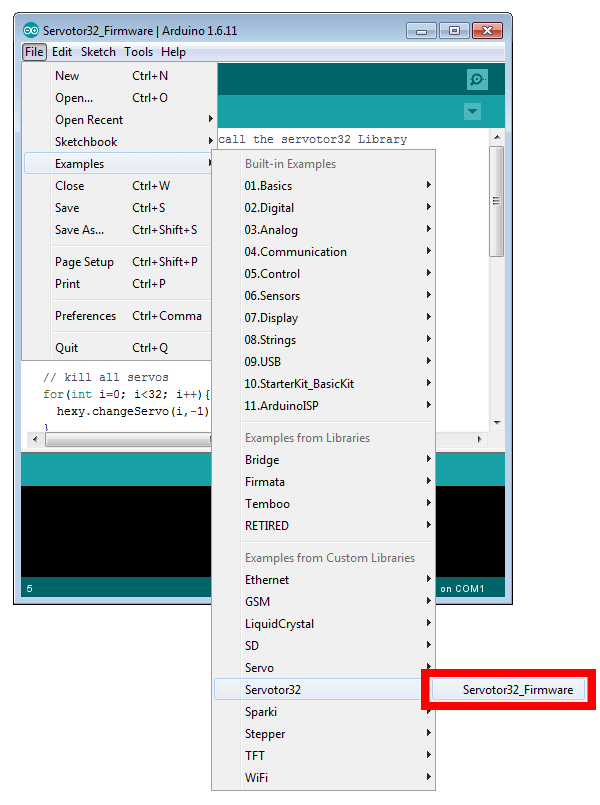
You should notice that this also installs the apporopriate library for Servotor32 as well: