


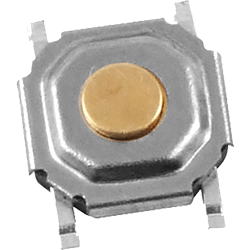
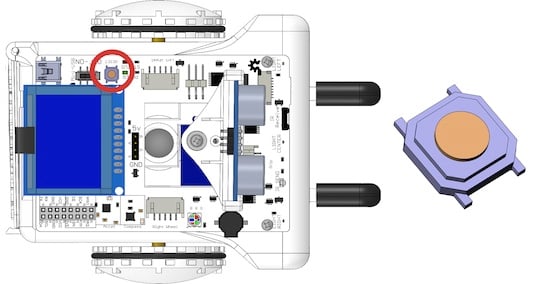
Reset Button
Learn how to use Sparki's Reset Button
Lessons You Should Know

Sparki has a reset button. It is used to reboot Sparki if it crashes and to put it into programming mode.
How It Works
When you press the reset button, here is what happens:
1. Sparki goes in to programming mode.
2. Sparki waits for 8 seconds for a new program to arrive.
3. If the computer gives it a new program, Sparki downloads the program and runs it. Otherwise, it runs the program already loaded on Sparki.
Reprogramming Manually
You can use this button to “manually” reprogram Sparki if it is not responding to being programmed. This can happen if something happens to the USB connection because of a bad program.
Here’s how:
1. With the board plugged into the USB port, hold down the reset button.
2. Pressing upload in the Arduino program.

3. Wait for “Uploading….” to appear at the bottom.
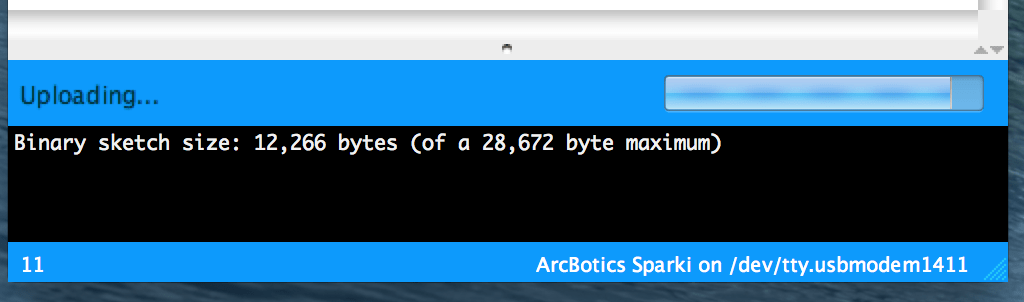
4. After it says this, release the reset button.
5. Sparki will enter programming mode, and the computer will send it a new program. It should then read “Done Uploading”.
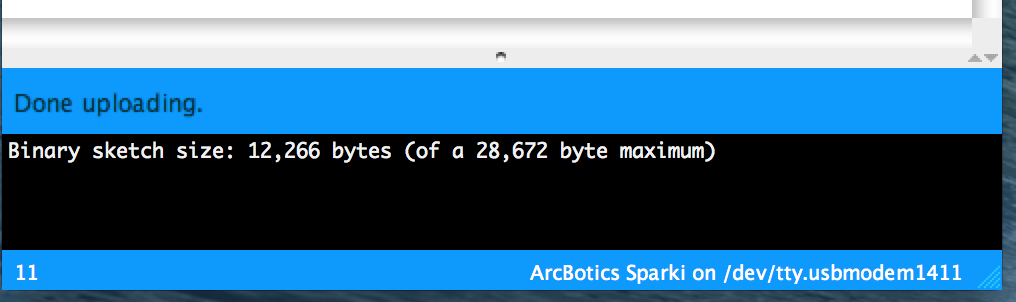
6. The new program should now run.
Technical Explanation
Sparki uses a slightly modified version of the Arduino Leonardo bootloader, which uses a virtual COM port. Typically, reset during the upload stage is accomplished via software reset by opening and closing a 1200 board connection on the virtual COM port, which initiates a reset into the bootloader. A new virtual COM port is established. The Arduino software waits for this new COM port to be established before attempting an upload. Once this new port appears, it attempts and upload using the AVR109 protocol.