


More Helpful Tools
More Tools That Can Help You Code
Lessons You Should Know

Some Tips & Tricks
Before we really get started there are some things that will help you learn about programming and tools that, no matter how good you get at programming, you’ll always use. So, we won’t be doing any programming on this page, but you’ll find out about ways to make your life easier.
Here’s what we’ll be covering on this page:
Find in Reference
SparkiDuino was created with beginners in mind so there are some tools that you can use if you’re confused about something. The best of these tools is the Reference menu option. It’s a built in help menu that you can use to look up pieces of code you may not understand. It’s really handy, so let’s learn how to use it!
First of all, you can only look up certain bits of code. You can’t look up variables that you’ve created and various other parts of code. Luckily SparkiDuino highlights the words that you can look up so they are easier to identify. The words you can look up are usually written in orange or blue. Here is some example code with the words that you could look up highlighted: 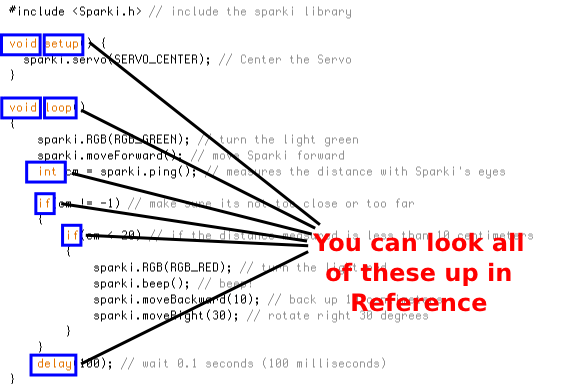
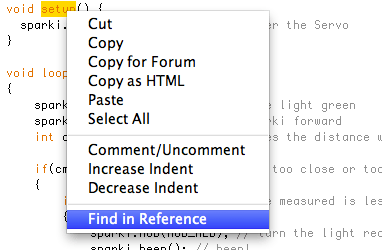
So how do you actually look these words up in the reference? Excellent question. First highlight the word you want to look up:
 Then use the button on the right hand side of the mouse to click so that you see a menu pop up. On some systems you may have to press command or option while clicking in order to get this window to pop up. Once this menu has popped up scroll down to where it says “Find in Reference.”
If the word is one that you can look up this will be an option you can select. If the word is not one you can look up “Find in Reference” will be grayed out and you won’t be able to select it. Once you select “Find in Reference” a window will open in a browser and it will show you information about the word you selected. You don’t even need an internet connection to use the reference since it is stored locally on your computer! This is the single biggest tool I can give you for learning about Sparki and the code you will be writing, so please use it often. It will save you a lot of headache.
Error Messages
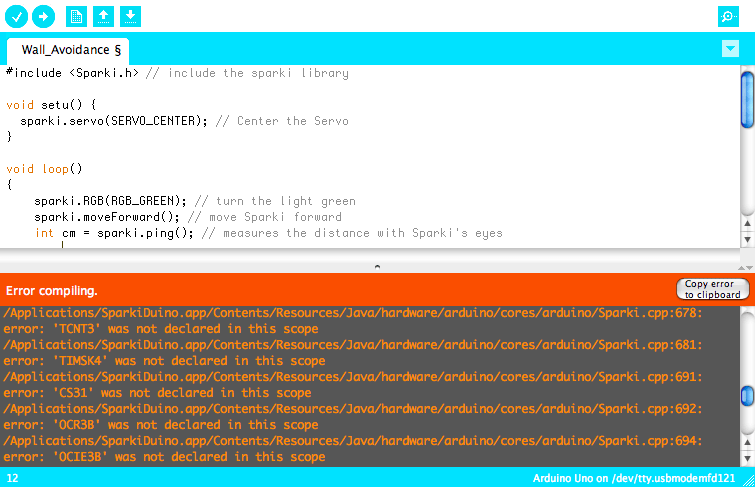
Ok. This one is a big topic. You’re going to run into error messages. Everyone does. The first step is to not think of them as “error messages.” They are more like puzzle pieces that will help you figure out your next move. They will pop up in the bottom portion of the SparkiDuino window when you’ve written some code that Sparki won’t be able to understand. They are usually written in red text and they show up after you’ve hit the compile or upload button. Sometimes they’ll be really easy to understand and sometimes they’ll make no sense at all. Here’s an example of one error message that showed up when I deleted the ‘p’ off of the word “setup”:
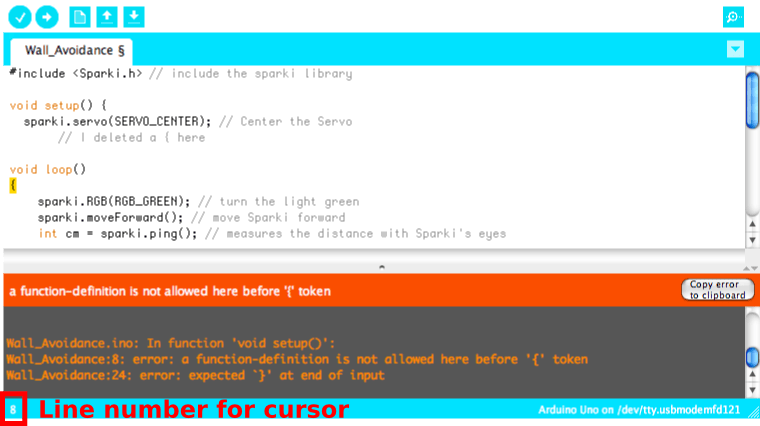
Like I said, sometimes they will be a little smaller and more helpful. Here’s what happens when I get rid of one of the curly brackets in my code by mistake:
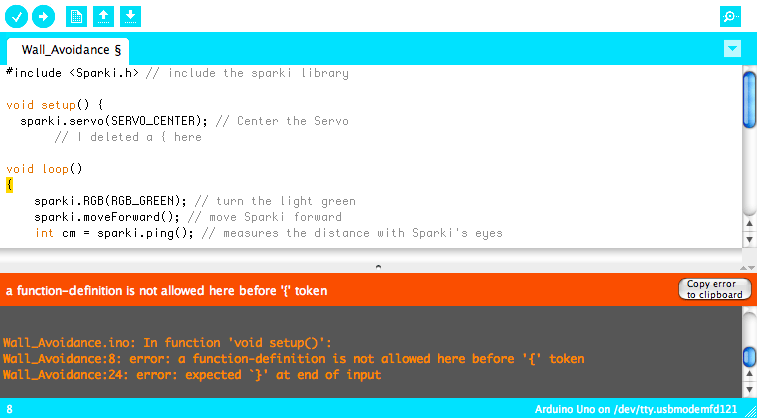
Let’s talk about the parts of this error message and how all of the clues it provides can help you.

First of all SparkiDuino highlighted a curly bracket at the beginning of the loop function. This is our first clue that the error is somewhere near the character that SparkiDuino highlighted. This is the place where SparkiDuino first encountered the error, so we know that the error is above this highlighted line of code.
 Our second clue is the part that says “a function-definition is not allowed here before ‘{‘ token.” This may seem like gobbelty gook right now, but it’s another way that SparkiDuino is trying to help. These types of error messages will make more sense as you get more experience with code. What this error message is saying is that Sparki is confused by the loop function definition that it found before the highlighted ‘{.’
Then there’s our third set of clues in the lines of error messages at the very bottom of the SparkiDuino window.

These even have something called line numbers in them and there are usually a whole bunch of error messages that you can sift through in case you really get stuck. The ones at the top of the list are usually the most useful. The one that says “In function ‘void setup()’:” actually tells you where SparkiDuino thinks your error may be! They won’t always be this useful, but something will show up in this part of the SparkiDuino window.
Before we move on it’s also very important to understand that error messages often come in bunches. If you get an error message and you work really hard to fix it don’t freak out if you get a new, different error message. That’s a good thing! It usually means you’re making progress. I always say that they shouldn’t be called “error messages,” instead they should be called “progress enabling messages.” I think that’s too long of a name so we’re stuck with the name “error messages.” Now let’s talk about line numbers and how to use them because they are really useful!
Line Numbers
Line numbers are numbers that tell you which line of code your cursor is on or which line of code an error message is talking about. There are generally two different places you can find them. Here’s the line number that shows where your cursor is right now:
Try clicking anywhere in your own code and see how this number changes. This is really useful for not only error messages but also for telling other people about your code and ideas for how to change it. By using a line number you can be sure that people understand exactly where in your code you are talking about, there’s no guessing!
Line numbers also show up in error messages so that you can figure out exactly where in the code SparkiDuino is talking about. It’s important to remember that usually when you see a line number in your error message that means that the error is somewhere before this line number. Here are some examples of error messages with the line number of the last error message highlighted:
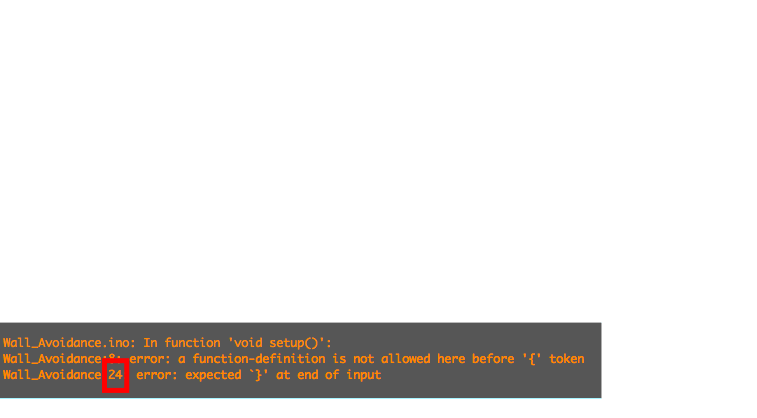
Error messages are all about using all the clues that you can to track down the problem in your code. Line numbers are a super useful guide to help you out!
Recap of What We’ve Covered So Far
or
Next Step:
We’ll move on to something called Pseudocode and strategies for writing code next. It may not be as exciting as making Sparki move around or beep, but these tools for writing code are extremely important for becoming a good coder, so stick with it!
Next Lesson – Variables