For Loops
Making Code Loop a Certain Number of Times
SparkiDuino
Easy
Lessons You Should Know

The for loop is designed to run a specific piece of code a certain number of times. It is similar to the while loop, because the code will run over and over. It is different because it has a built-in way to stop after it runs a specific number of times. Here’s what we’ll be covering on this page:
 Here is the code that makes a for loop:
Here is an example for loop to check out:
This is much more complicated to set up than a while loop, so let’s examine it.
As long as the code about is true the robot will drive away and complete a loop around the racetrack, which is our for loop statement code. This first time ‘i’ is equal to zero so the robot will take off and execute the code inside of the for loop’s curly brackets.

 Now that the robot has cruised around the racetrack once when it gets to the start line again it will check for a second time to see how many times it has gone around the racetrack. After adding one to the variable ‘i,’ it is now equal to one. That means the robot can continue to race!
 The robot went around the racetrack ten times! Now ‘i’ is equal to ten and the condition inside the for loop parentheses is false. Ten is not greater than ten, it is equal! That means the race is done. The robot will hop out of the race car and the for loop. Our robot buddy is now free to move on to doing whatever code comes next in the program.
- For Loops
- Creating an Integer
- Checking the Integer
- Changing the Integer
- When the For Loop is Over
- One Last Thing
For Loops
You can think of a for loop as a racetrack that a robot will drive around a certain number of times. Here is the code that makes a for loop:
|
1 2 3 4 |
for (initialization; condition; increase) { statement } |
|
1 2 3 4 |
for (int i = 0; i < 10; i = i + 1) { statement } |
Create an Integer to Keep Track of Times Around the Loop
The very first thing that the for loop does is create an integer named ‘i.’ When it is first created the variable i is equal to zero. This is sort of like creating a counter to keep track of how many times the robot has raced around the racetrack. When the robot starts at the beginning of the race the counter will usually be equal to zero since the robot hasn’t traveled around the race track at all. You could call this variable whatever you want but most programmers just call it ‘i.’ That’s because the variable will always be an integer and ‘i’ is nice and short.|
1 |
int i = 0; |

The robot hasn’t started moving yet, but it’s revving the engine and people watching have taken out a notebook to keep track of how many times the robot has been around the racetrack.
Check the Integer Value
Ok. It’s almost time for the robot to cruise around the track. Before the robot can cross the start line it needs to check to make sure that it hasn’t gone around the track too many times. I know the robot hasn’t even driven around the racetrack once yet, but hey, it’s a robot, it plays by the rules. So now the robot checks the next part of the for loop which is what tells it when it has finished racing.|
1 |
i < 10; |

Changing the Integer Value
After cruising around the racetrack (executing the statement code inside of the curly brackets) the robot has to do one more thing before it can cross the start line again and check to see if it has completed the race. It needs to make sure it counts the number of times it has actually gone around the racetrack by adding one to the variable ‘i.’ It’s almost as if the crowd watching and the robot make a mark on a piece of paper to keep track of how many times the robot has been around the racetrack.|
1 |
i = i + 1 |

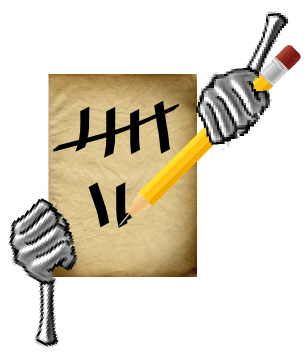
The seventh time around the race track the robot’s tally will be seven
 Now that the robot has cruised around the racetrack once when it gets to the start line again it will check for a second time to see how many times it has gone around the racetrack. After adding one to the variable ‘i,’ it is now equal to one. That means the robot can continue to race!
When the Race is Up
Eventually the robot will race around enough times that the variable ‘i’ will make the for loop stop. Let’s see what that looks like: The robot went around the racetrack ten times! Now ‘i’ is equal to ten and the condition inside the for loop parentheses is false. Ten is not greater than ten, it is equal! That means the race is done. The robot will hop out of the race car and the for loop. Our robot buddy is now free to move on to doing whatever code comes next in the program.
This Might Trip You Up
One thing that often confuses new programmers is that the for loop integer usually starts counting at zero. (That’s just how computers count.) Since the robot checks the integer variable before adding one it’s important to remember that it starts counting at zero. If your for loop is executing code one more time than what you want, keep this in mind.Try it with Sparki
Here is an example of a for loop with Sparki. It will beep the buzzer 3 times rapidly, then wait 2 seconds. Because it is running this code in the loop, it will run this code forever. You can try changing it to increase the number of times it beeps in a row:|
1 2 3 4 5 6 7 8 9 10 11 12 13 14 15 16 |
#include <Sparki.h> // include the sparki library void setup() { } void loop() { for (int i = 0; i < 3; i=i+1) { sparki.beep(); // Sparki beeps! delay(300); // wait 0.3 seconds } delay(2000); // wait two seconds (2000 milliseconds) } |