


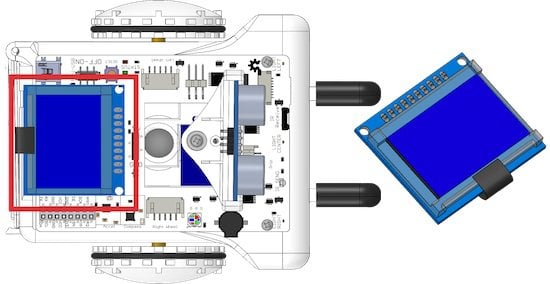
Sparki has an LCD with 128 by 64 pixels. It is used to display information in the way a computer monitor displays information – just tinier!
How It Works
The LCD works by having a lot of pixels, or small rectangle blocks. Pixels make up any image you see on almost any screen, whether it is a TV, computer or phone. By putting together these blocks and turning them on and off at the right time and in the right pattern, you can create images.
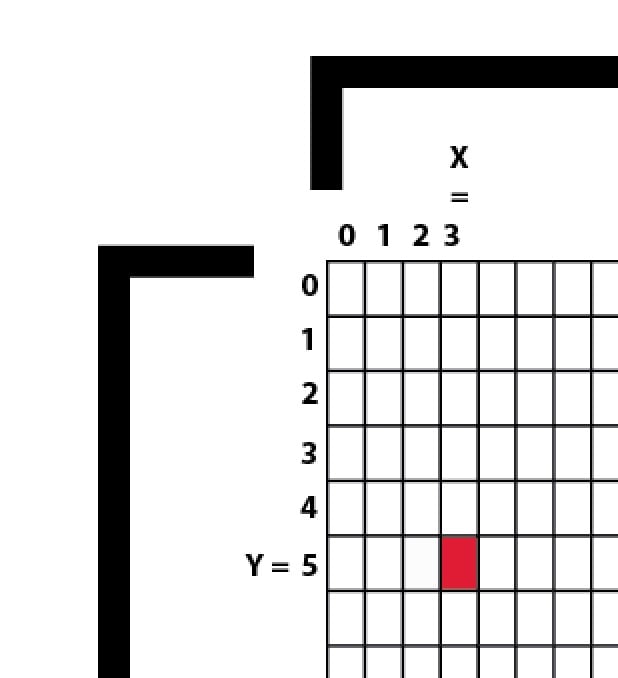
For the sake of being able to identify each pixel on Sparki’s LCD, we have given co-ordinates to each pixel so it can be identified:
This pixel, for example, would be at X = 3, Y = 5:
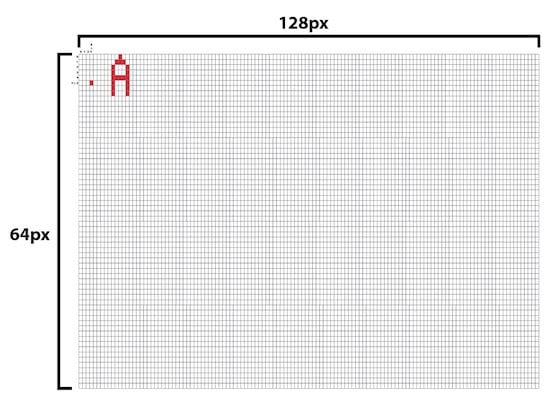
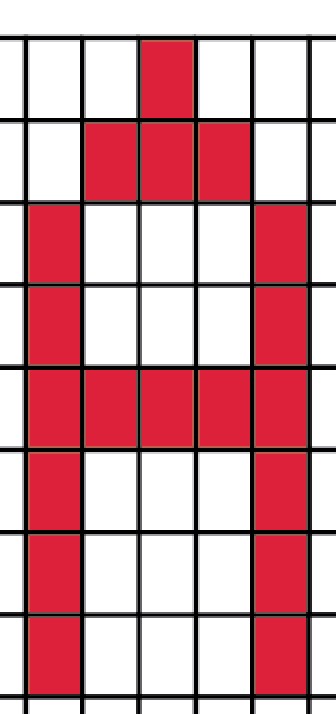
Turn on and off enough of these pixels, and you can get an image, like the letter ‘A’:
Programming each pixel on and off individually to create images would be really boring, so the computer takes ‘higher-level’ commands and turns them into pixels automatically. Instead of telling the computer to turn on and off pixels to make the letter ‘A’ for example, you can just give it the command to display ‘A’, and it will automatically display ‘A’, because someone has already told the computer how to turn on and off pixels to make an ‘A’. The faster it can do this, the smoother motion appears.
Using the Part
If you want to learn more about this part usage, you can try this lesson. With the basic Sparki code in place:
1. You control the LCD with these commands:
sparki.clearLCD(); // wipes the LCD clear. Done before drawing new items.
sparki.updateLCD(); // draws written information on the LCD. Done after drawing new items.
2. You draw on the LCD using these commands:
sparki.drawPixel(xPixel, yPixel); // fill in pixel at coordinates xPixel, yPixel
sparki.readPixel(xPixel, yPixel); // read color in pixel at coordinates xPixel, yPixel
sparki.drawChar(xPixel, yLine, char); // draw a character char at coordinates xPixel, yLine (8 lines on the LCD)
sparki.drawString(xPixel, yLine, *char); // draw a sting of *char at coordinates xPixel, yLine (8 lines on the LCD)
sparki.drawLine(xStart, yStart, xEnd, yEnd); // draw a line from xStart, yStart to xEnd, yEnd
sparki.drawRect(xCenter, yCenter, width, height); // draw a rectangle with its center at xCenter, yCenter that is width wide and height tall
sparki.drawRectFilled(xCenter, yCenter, width, height); // draw a filled-in rectangle with its center at xCenter, yCenter that is width wide and height tall
sparki.drawCircle(xCenter, yCenter, radius); // draw a circle with its center at xCenter, yCenter with a radius of radius
sparki.drawCircleFilled(xCenter, yCenter, radius); // draw a filled-in circle with its center at xCenter, yCenter with a radius of radius
sparki.drawBitmap(xStart, yStart, *bitmap, width, height); // draw a picture of *bitmap that starts at at xStart, yStart that is width wide and height tall
SparkiDuino already has code examples for you to use:
File > Examples > LCD