


Using the Remote
How to use Sparki with it's remote.
Lessons You Should Know

Introduction
Sparki’s comes with an Infrared Remote Control, which works with Sparki’s Infrared Remote Receiver.
This lesson will cover how the remote works, how to test it out, how to program your own code for the remote, and an example that fully uses the remote to turn Sparki into a remote-controlled robot (it’s default program when it comes out of the box.
How it Works
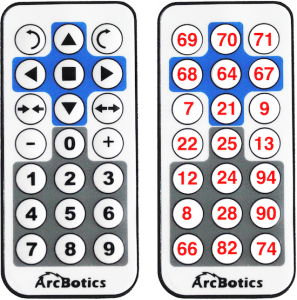
Each button on the remote sends a certain code to Sparki, which it can receive with its infrared remote receiver. The codes each button on the remote sends is listed below:
The code the remote sends is a rapidly blinking infrared light. It’s an invisible flashlight that blinks really, really fast (38,000 times a second) in different patterns, depending on which button is pressed. By measuring the amount of time between each flashing, Sparki can tell if each burst is meant to be a 1 or a 0, known as bits::
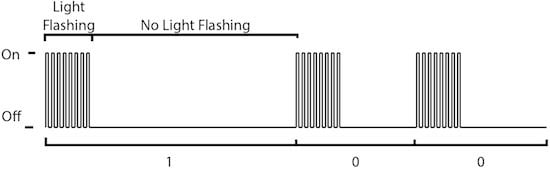
Sparki counts these flashes until 32bits have been counted, then turns this into a number. Specifically, Sparki uses the NEC infrared code protocol
Using the Remote
With the basic Sparki code in place, you can measure an infrared sensor by using this command:
sparki.readIR();
This command returns the last code that was sent to Sparki. It returns this number in the form of an integer. If there has not been a code sent since the last time Sparki ran this command, it will send back a -1.SparkiDuino already has code examples for you to use: File > Examples > Remote
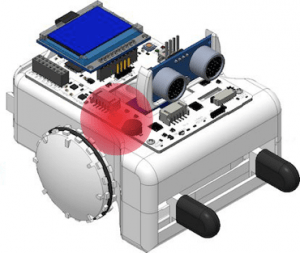
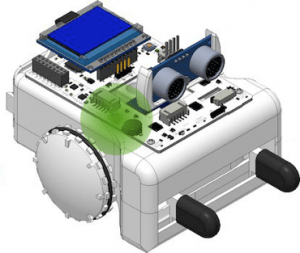
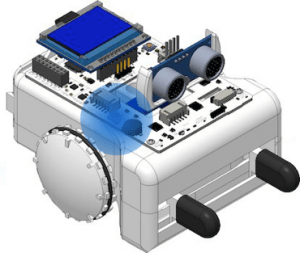
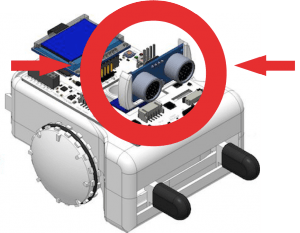
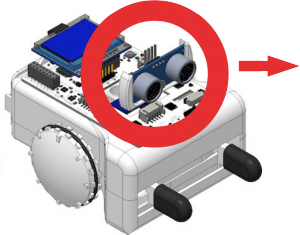
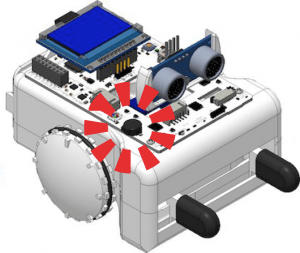
In order for the remote to be able to talk to the robot, the remote needs to have an unobstructed line of sight to the infrared receiver. This is because anything in between the remote and Sparki will block the infrared light that the remote is emitting. We can’t see them, but there are a bunch of infrared photons that come out of the remote whenever you press one of the buttons. While it isn’t important that the robot is facing towards you, the infrared signal probably won’t talk to the robot through a table, for example.
Testing the Remote
Here’s a basic code example. The purpose is to show the IR code that Sparki is recieving from the remote. We’ll ready the IR code from the remote, then display it on the LCD. This code is useful if you’re not sure if the remote working, or just as a starting place for your own remote code.
#include// include the sparki library void setup() { sparki.clearLCD(); //clear the LCD of the Sparki logo } void loop() { int code = sparki.readIR(); // read any IR code Sparki has seen if(code != -1){ // if Sparki has recently seen in IR code sparki.print("Received code: "); // Say we've receved a code... sparki.println(code); // ... and what that code's nubmer was } sparki.updateLCD(); // refresh the LCD }
Controlling Sparki
We can expand on that program to include almost all of Sparki’s visible functions. Below is example code that takes the codes, and does an action for each code. This is also the code that comes pre-programmed on Sparki.
Remember when having Sparki move: it needs fresh batteries, it’s On/Off Switch ‘On’, and to be watched to prevent it from falling off edges.
/******************************************* IR Remote Sparki has a sensor that lets it receives commands from the included remote control. Try moving it around! ********************************************/ #include// include the sparki library void setup() { sparki.clearLCD(); } // /------^----- // | | // | 69 70 71 | // | 68 64 67 | // | 7 21 9 | // | 22 25 13 | // | 12 24 94 | // | 8 28 90 | // | 66 82 74 | // ____________/ void loop() { int code = sparki.readIR(); if(code != -1){ sparki.print("Received code: "); sparki.println(code); } switch(code){ // Movement buttons case 70: sparki.moveForward(); break; case 21: sparki.moveBackward(); break; case 67: case 71: sparki.moveRight(); break; case 69: case 68: sparki.moveLeft(); break; case 64: sparki.moveStop(); sparki.gripperStop(); break; // Gripper Buttons case 9: sparki.gripperOpen(); break; case 7: sparki.gripperClose(); break; // buzzer case 74: sparki.beep(); break; // Servo Buttons case 90: sparki.servo(SERVO_LEFT); break; case 28: sparki.servo(SERVO_CENTER); break; case 8: sparki.servo(SERVO_RIGHT); break; // RGB LED case 25: sparki.RGB(RGB_OFF); break; case 12: sparki.RGB(RGB_RED); break; case 24: sparki.RGB(RGB_GREEN); break; case 94: sparki.RGB(RGB_BLUE); break; default: break; } sparki.updateLCD(); }

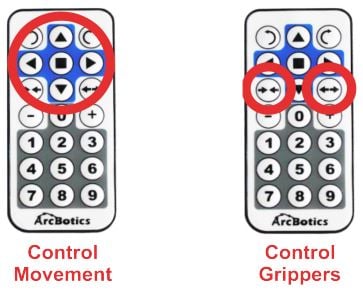
After uploading this code (or before you’ve ever uploaded any code before – this is the code that comes with Sparki), you can now use the buttons to do the following:/
The top buttons of the remote are laid out to control the Sparki’s direction of movement and grippers. Try using the different arrow buttons to see what happens with your robot. Remember, the stop button stops the movement of both the robot and the grippers in case Sparki starts to get away from you.
Here is how the number commands work:
1: RGB LED turns red.
2: RGB LED turns green.
3: RGB LED turns blue.
4: Sparki turns the rangefinder to the left(using Sparki’s servo).
5: Sparki turns the rangefinder to the center (using Sparki’s servo).
6: Sparki turns the rangefinder to the right (using Sparki’s servo).
7: Stop the included program (autonomous room navigation).
8: Run the included program (autonomous room navigation).
9: Buzzer ring.
The +, 0 and – buttons do not do anything:
