

How to upload Sparki code using miniBloq
This guide will show you how to upload new code onto Sparki. Uploading code erases the old code that was on Sparki before, and replaces it with the new code.
You will use miniBloq to upload code onto Sparki. If you haven’t downloaded minibloq yet click here for the download page.
![]() Following this example will erase the program that interacts with the remote.
Following this example will erase the program that interacts with the remote.
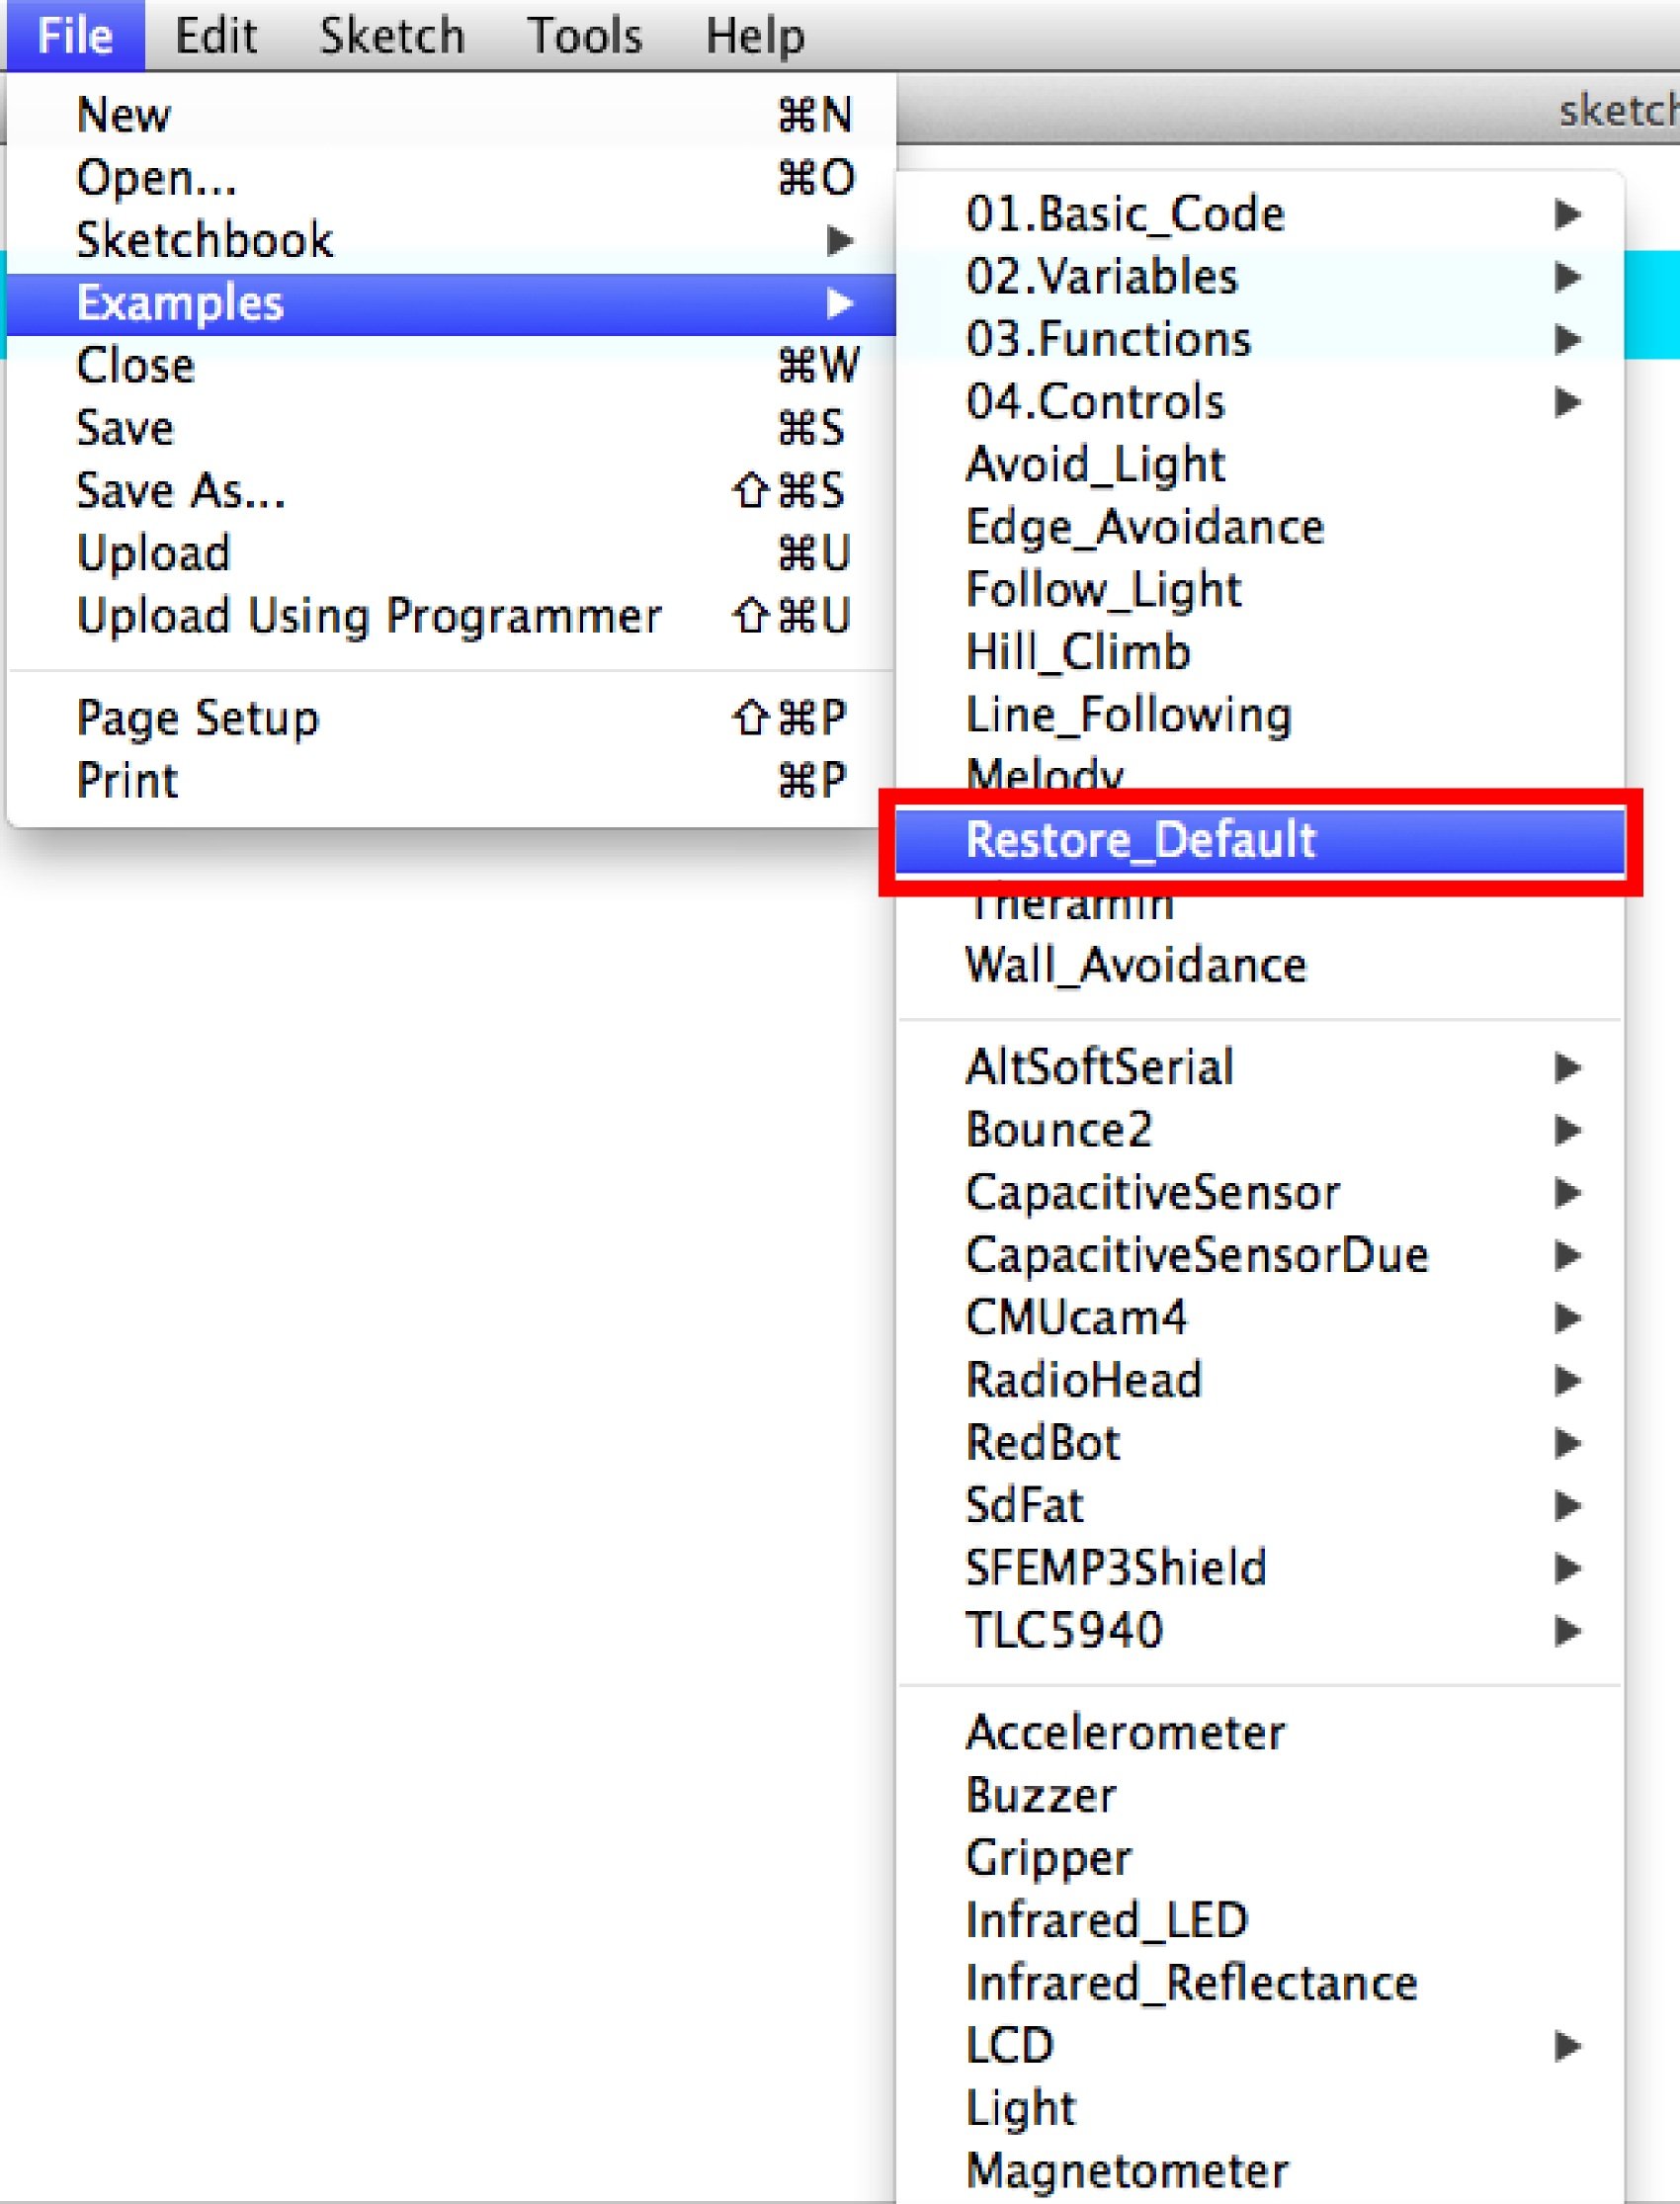
Choose this example code once you are done with this tutorial to restore Sparki’s default code
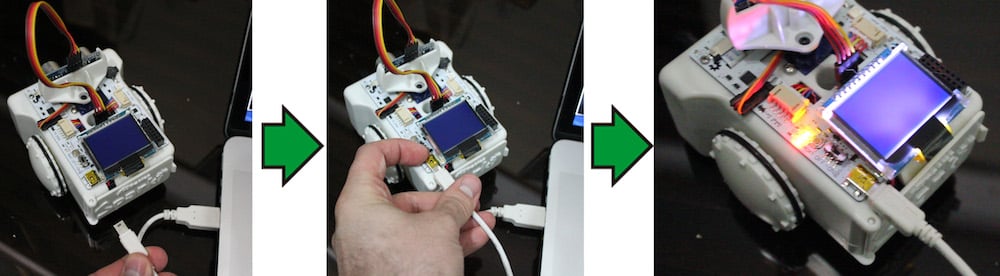
Once the SparkiDuino software is installed, plug Sparki’s USB cable into your computer’s USB port and Sparki. The smaller end of the USB cable plugs into Sparki while the larger end of the cable plugs into your computer. You cannot program Sparki over the Bluetooth module.
![]() If you are using Windows, it may take some time for the drivers to install automatically while Sparki is plugged in. Please be patient.
If you are using Windows, it may take some time for the drivers to install automatically while Sparki is plugged in. Please be patient.
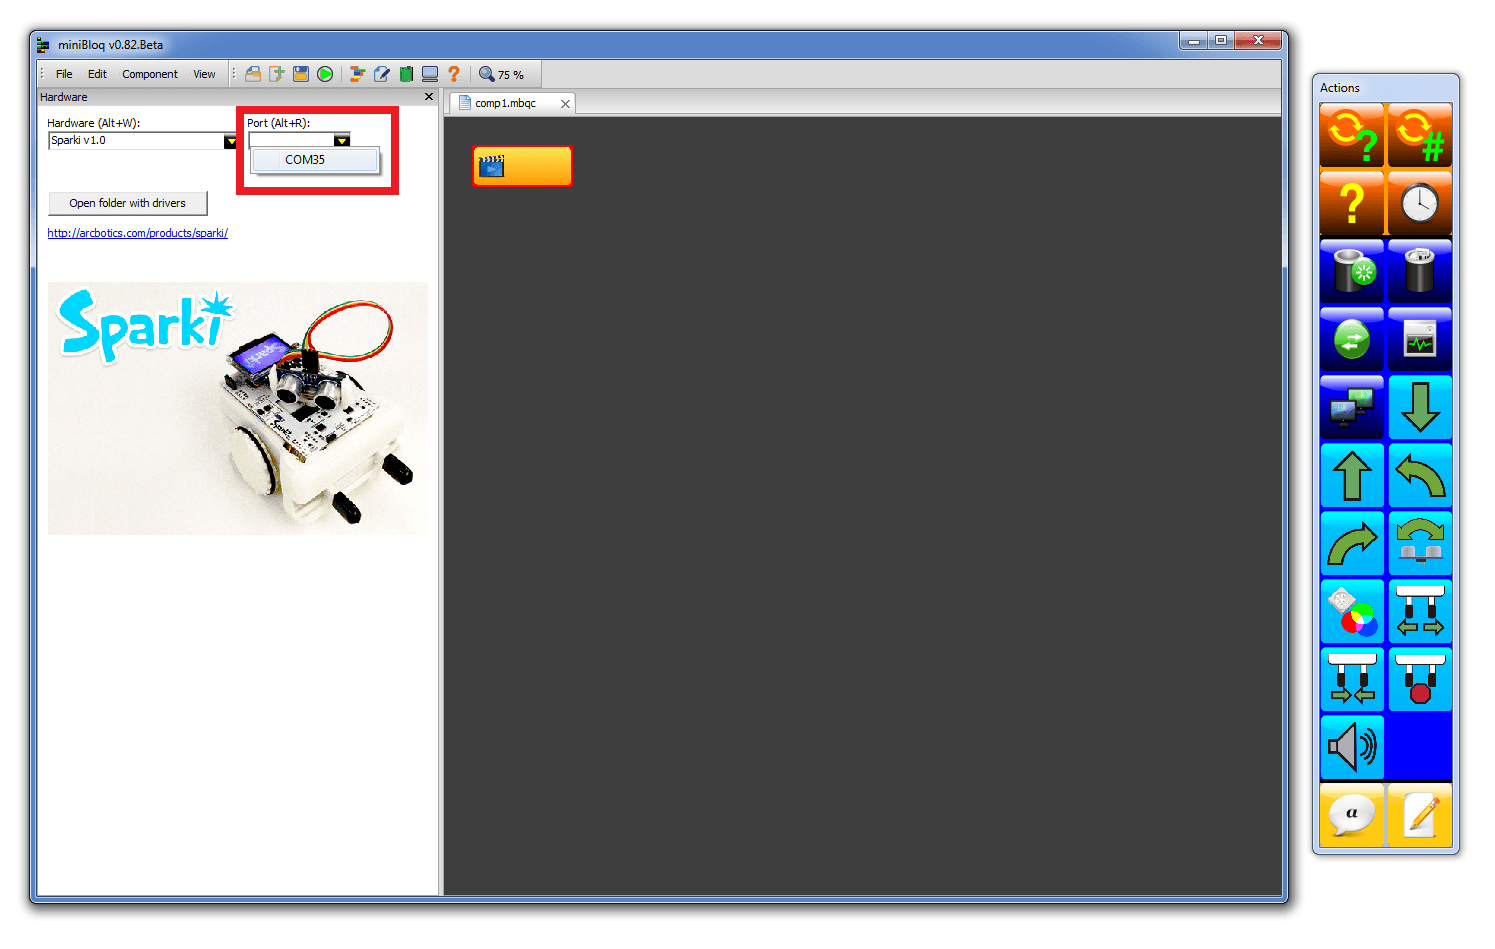
Sparki should already be selected when you start miniBloq.

Once you have selected Sparki as the board SparkiDuino is talking to, then select the serial device of the Sparki board from the Tools | Serial Port menu.
You need to select the Serial Port because any time you plug anything into your computer it uses a different Serial Port. If you have a printer, a phone and Sparki all plugged into your computer they will each show up as a different Serial Port. The Port names aren’t anything useful like “Phone,” so you need to figure out which one is Sparki. If you try to upload Sparki code onto your printer it’s definitely not going to work!
![]() If you’re not sure which Port is Sparki, try looking at the ports in the Serial Port menu before plugging in Sparki, and again after plugging in Sparki. The Port that shows up after you plugged in Sparki should be Sparki. It’s ok to try and upload code to the wrong Serial Port while you figure this step out- you’re not going to destroy anything. The worst things that can happens is that you will get an error message and you need to get comfortable with error messages if you are going to be working with code or robots!
If you’re not sure which Port is Sparki, try looking at the ports in the Serial Port menu before plugging in Sparki, and again after plugging in Sparki. The Port that shows up after you plugged in Sparki should be Sparki. It’s ok to try and upload code to the wrong Serial Port while you figure this step out- you’re not going to destroy anything. The worst things that can happens is that you will get an error message and you need to get comfortable with error messages if you are going to be working with code or robots!
![]() On Windows, this should be something like
On Windows, this should be something like COM3, COM4, or COM5. If you see COM1 and COM2, they are unlikely to be Sparki.
You’ll need something to upload to Sparki. Here we’ve made a little program that will have Sparki move forward 10cm and turn right 90 degrees. The block are shown on the left, and the code that the blocks generate are on the right.
So you don’t have to write any code to test your upload we will use one of the examples – the RGB – from the Sparki examples. All example code and code you write upload the same way. This will make Sparki’s RGB LED light up different colors so that you can tell the code upload worked.
Here is an image are selecting the RGB example code. When this RGB code is selected and uploaded, the RGB LED on Sparki will light up first Red, then Green and finally Blue, before starting over with Red.

While the code is being uploaded, Sparki’s status light first pulses red while in programming mode, then blinks rapidly while the program is being sent. The LED’s first pulses indicate that code is being passed to Sparki and stored in memory. The LED’s rapid blinking after that indicates that a copy of the code is being sent back to the computer from Sparki to verify that all of the code made it onto Sparki’s memory. Once all of this is done the RGB LED then turns solid red for a moment, then off and then runs the program:
The console then lets you know that it is done uploading:
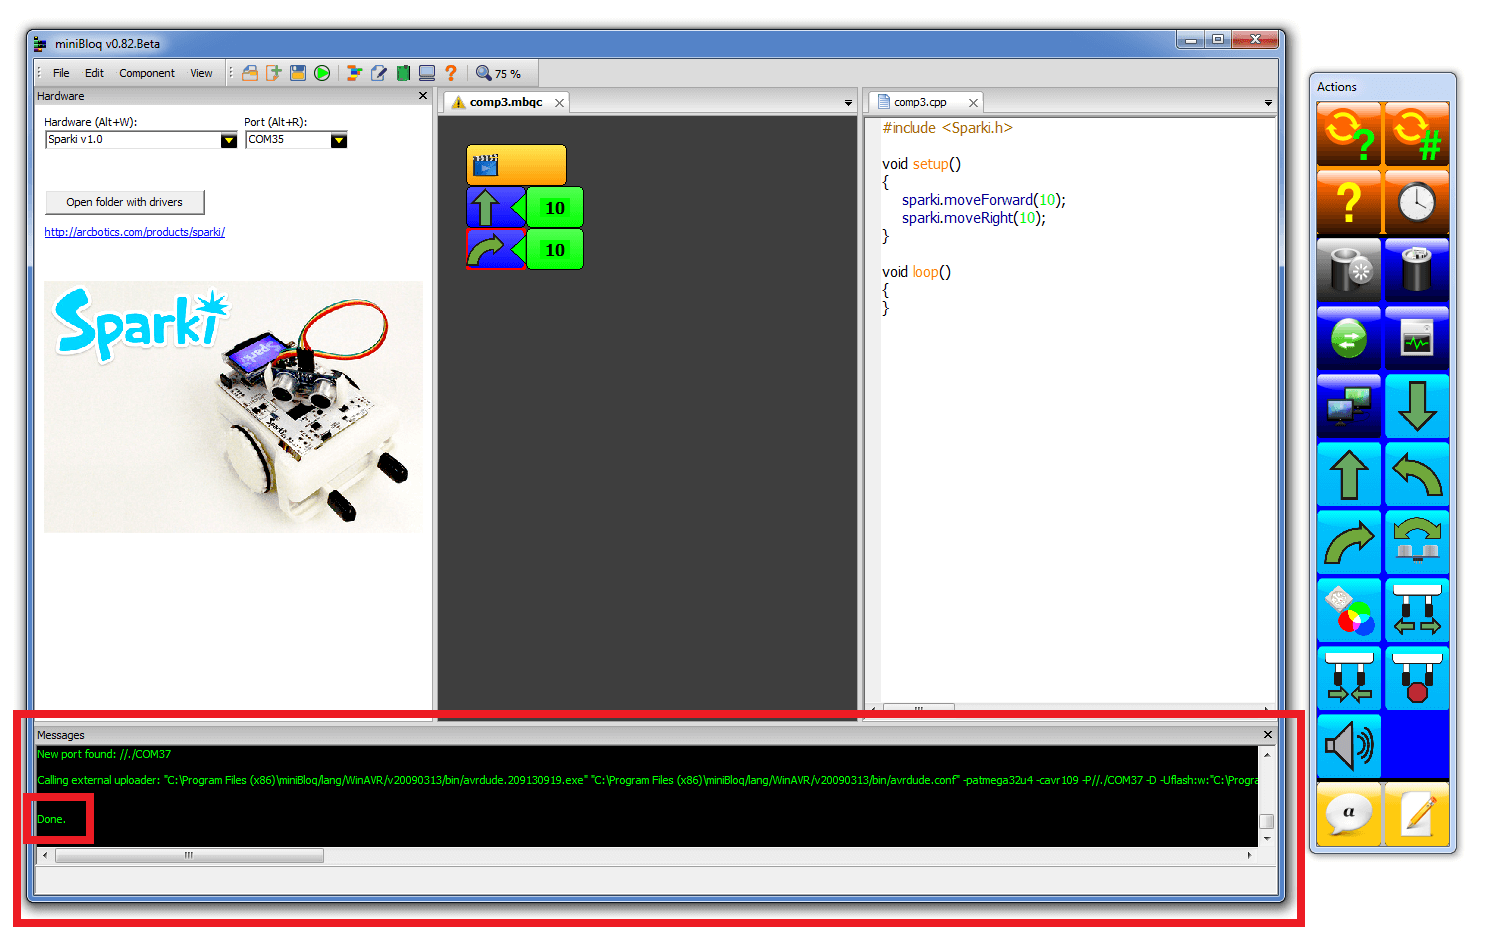
Now your Sparki will move forward, and turn right!
Click here for a lesson about programming Sparki with miniBloq to move forward