Sending Bluetooth Commands to Sparki from an Android
So you’ve pair Sparki with your Android as outlined here, huh? Now you probably want to use your Android device to control Sparki, right?
Great, sending commands to Sparki from the Android is fairly simple. We’re going to cover that in this lesson, using the code from the Using USB serial and Bluetooth Communication lesson you may have looked at earlier.
The shortened version of the code is below. You may notice that it’s a little different from the code I mentioned earlier. This is because I took the beginning portion of the code out. In the downloadable version of the code you can still see that code, but it’s commented out. The reason we don’t want that code is because Blue Term cannot connect to Sparki while the robot is busy spitting out a bunch of information. Blue Term can receive communication from Sparki, but not during the period of time while you are connecting the two.
#include <Sparki.h> // include the sparki library

String inputString; //make an empty String called inputString
boolean returnFlag; //flag to check for carriage return
boolean oKSent; //flag to check for OK communication
char commArray [10]; //array to store communication
int arrayCounter = 0; //integer to count through commArray
int boredCounter = 0;

void setup()
{
 Serial1.begin(9600);
}

void loop()
{
 readComm();
 makeMove();
}

void makeMove(){
 for(int i = 0; i <= 9; i++)
  {
  if(commArray[i] == 'f' || commArray[i] == 'F')
   {
   sparki.moveForward();
   delay(1000);
   sparki.moveStop();
   }
   else if (commArray[i] == 'r' || commArray[i] == 'R')
   {
   sparki.moveRight(90);
   }
   else if (commArray[i] == 'l' || commArray[i] == 'L')
   {
   sparki.moveLeft(90);
   }
   else if (commArray[i] == 's' || commArray[i] == 'S')
   {
   sparki.moveStop();
   delay(1000);
   }
   else if (commArray[i] != 0) //in case it's a character sparki doesn't know
   {
   Serial1.print("I'm sorry, I didn't understand the command- ");
   Serial1.println(commArray[i]); //send the character back
   }
 }
 memset(commArray, 0, sizeof(commArray)); //clear out commArray
}

void readComm()
{
 while (Serial1.available())
 {
 int inByte = Serial1.read();
 if ((char)inByte == '\n')
   {
   returnFlag = true;
   arrayCounter = 0;
   }
   else
   {
   if(inByte == 32) //if it's a blank space
   {
   arrayCounter ++; //increment array counter to store in new array space
   }
   else
   {
   //add the character to the arrayCounter space in commArray
   commArray[arrayCounter] = (char)inByte;
   }
  }
 }
}
 Go ahead and put this code on Sparki. That way you’ll be able to test that Sparki is able to both receive and send commands to and from your Android device.
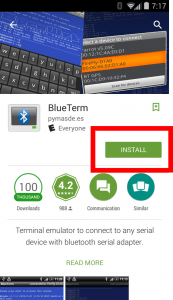
Now we’ll need to download a Serial communication terminal emulator for the Android device. There are plenty out there, I choose to use Blue Term since it is Open Source (like the hardware and software that Sparki is built upon!), free and had a pretty good rating.
Download and install this App. It should only take a second or two.
Find the Blue Term App on your Android device and open it.
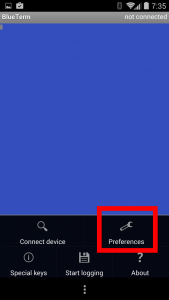
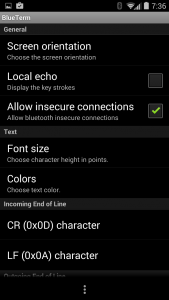
The first thing we’re going to do is going into the preferences and turn on Local Echo. This way you’ll be able to see what you’re sending to Sparki. To find the settings click on the menu icon at the very bottom of the App. This will open a menu with various options. Tap on the “Preferences” menu option.
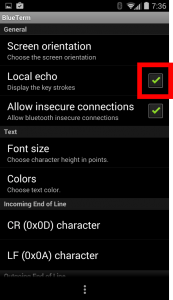
Now click on the checkbox next to where it says “Local Echo.” If you feel comfortable with Bluetooth communication where you can’t see what you’re typing (and what is being sent to Sparki) feel free to leave this option unselected. After you have selected “Local Echo” press the back button which is standard on most Android devices. (For some reason clicking on the menu icon at the bottom of Blue Term didn’t work for me.)
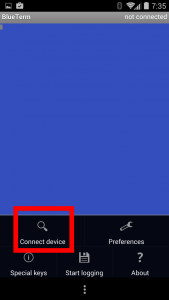
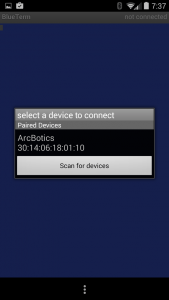
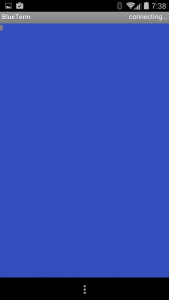
Now press the menu icon again. When the menu pops up select “Connect device.” This will bring you to a pop up menu where you should be able to select the “ArcBotics” Bluetooth module. If you don’t see the “Arcbotics” device try pressing the “Scan for devices” button. (Are there a bunch of devices and you’re not sure which one is Sparki’s module? Try shutting Sparki off and watching the Android App to see which Bluetooth device disappears. By process of elimination you know the disappearing device is Sparki’s. Turn Sparki back on and select the device when it reappears in your App.)
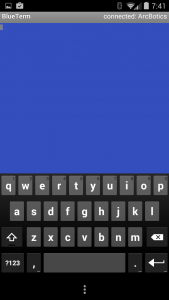
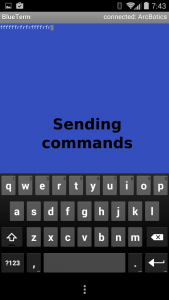
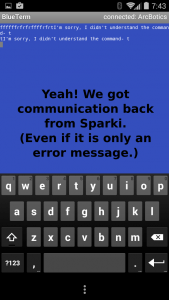
Once you’re connected the upper right of the App will read “connected: Arcbotics” and a keyboard will pop up. You’re ready to try out some letter commands via Bluetooth serial communication. Try a couple ‘f’ or “F” commands to make Sparki move forward. Does Sparki move forward? Good! Now try a letter command that Sparki won’t understand. You should get a return message that reads “I’m sorry, I didn’t understand the command-” followed by the letter you typed. This way we can make sure that communication is happening in both directions. Like most terminal programs you won’t be able to delete anything in the terminal screen. In fact, if you use the delete button you’ll get yet another “I’m sorry, I don’t understand” message from Sparki!
Now you have the tools you need to write all sort of code that will make Sparki perform actions which you can control from your Android device! Not sure where to go next? How about combining some animation with your motoring skills? Or maybe you want to make Sparki play some music that corresponds to the notes (A, B, B#, C etc.) you type into your Android.
There are also Apps for using Android devices to program robots like Sparki. But if you’re really curious I’ll give you some tips- you’ll need a special cable called an OTG Cable (it stands for On The Go) and you’ll need to look into an App called Arduino Commander. From here on out, if you want to use your Android to program your Sparki, you’ll need to find the resources yourself! (They’re out there.)


