Making Sounds
Sparki’s buzzer does more than the single tone beep you have probably heard before! In this tutorial, you’ll learn how to make Sparki play music.
What You’ll Need
- A Sparki.
How It Works
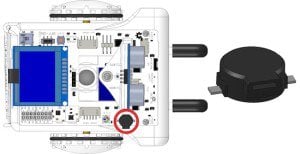
Sparki has a buzzer that can play various tones.
 Sparki and a close up of the buzzer
The voltage causes the buzzer to bend, and it outputs sound waves:

The voltage applied to the piezoelectric speaker causes it to bend and flex.
This bending and flexing moves the air around, and creates what we perceive as sound waves.
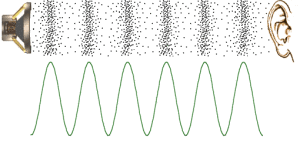
Sounds coming out of the speaker
The closer the waves are together, the higher humans perceive the sound to be. The farther away the waves, the lower the sound. By changing the frequency with which the buzzer oscillates, we can bunch up the waves or space them out, making the sound seem higher or lower.
Programming It With Sparki
Using the buzzer from your own program is easy. For example, the following code produces just a small beep:
/*******************************************
Basic Buzzer test

Sparki has a buzzer on its back. Try
making it beep!
********************************************/
#include <Sparki.h>  // include the robot library

void setup()
{
}

void loop()
{
    sparki.beep(); // Sparki beeps!
    delay(1000); // wait a second (1000 milliseconds)
}
Now let’s make something a bit more complex: playing different notes. For example, 440 Hz is the frequency of an A note. If you double that frequency, you get the next A note in the music scale.
So, let’s play A notes:
#include <Sparki.h> // include the robot library

int counter = 1;

void setup()
{
}

void loop()
{
    if (counter > 5) //We have to put a limit: why?
        counter = 1;
    sparki.beep(counter*440); // Increasing "A" notes!
    counter++;
    delay(1000); // wait a second (1000 milliseconds)
}

Did you hear the octaves?
Finally, there is another parameter that we can modify on a note, aside from its frequency: its duration. The sparki.beep() let’s you use a second number, after the frequency number. This second number tells how long to beep in milliseconds (one-thousandth of a second). We will use this in the next example.
Making Music
In reality, since all the music you have heard corresponds to a pretty well-established series of notes, we have programmed all those notes in for you to use as constants.
This code uses Sparki basic code, arrays, variables, integers, for loops, and the buzzer. The note pitches are stored in one array, and the note durations are stored in another. This code loops through all of them to play the melody!
This example shows how to make a short melody with Sparki’s buzzer:
/*******************************************
Melody

This example shows how to make a short melody
with Sparki's buzzer.
********************************************/
#include <Sparki.h> // include the sparki library
#include "pitches.h" // include a list of pitches

// notes in the melody:
int melody[] = { NOTE_C4, NOTE_G3,NOTE_G3, NOTE_A3, NOTE_G3,0, NOTE_B3, NOTE_C4 };

// note durations: 4 = quarter note, 8 = eighth note, etc.:
int noteDurations[] = { 4, 8, 8, 4, 4, 4, 4, 4 };

void setup() {
  // play each note in the arrays
  for (int thisNote = 0; thisNote < 8; thisNote++) {

    // calculate the note duration as 1 second divided by note type.
    //e.g. quarter note = 1000 / 4, eighth note = 1000/8, etc.
    int noteDuration = 1000/noteDurations[thisNote];
    sparki.beep(melody[thisNote],noteDuration);

    // to distinguish the notes, set a minimum time between them.
    // the note's duration + 30% seems to work well:
    int pauseBetweenNotes = noteDuration * 1.30;
    delay(pauseBetweenNotes);
    // stop the tone playing:
    sparki.noBeep();
  }
}

void loop() {
  // no need to repeat the melody.
}

Great job! You made Sparki play a song. Can you write a different song and make Sparki play that? How about finding the music online to a favorite song and making it play that?
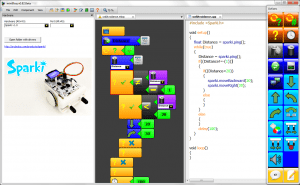
Lesson available for the miniBloq Programming Environment
This lesson is also available for the miniBloq Programming Environment. miniBloq is a graphical programming environment that you can use to easily program your Sparki.


