


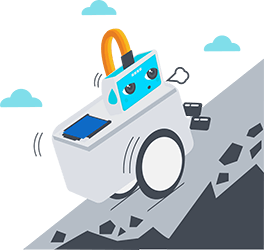
Hill Climb
Sparki likes a challenge! Teach it to climb up the steepest slope.
Lessons You Should Know
Introduction
Sparki can use its accelerometer to figure out the highest point on a hill.
What You’ll Need
- A Sparki.
- A sloped surface for Sparki to find the top of.
Note: When selecting a curved surface for Sparki to climb on, consider that Sparki won’t like dirty or muddy surfaces, and that cleaning the robot is probably not fun.
How It Works
If you knocked a book off the table, you know that it would fall and what direction it would fall. This is because you inherently know which direction gravity works in. You’d even know what direction the book would fall in if you had just woken up and were laying on your side, forcing your “sideways” to be gravity’s actual down.
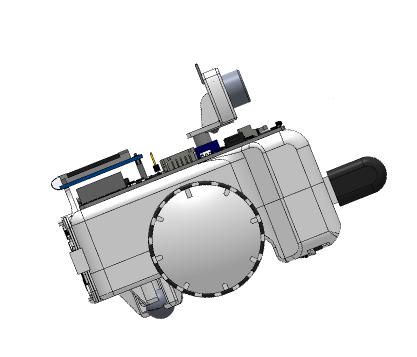
Sparki has an accelerometer that constantly tells it what direction down is as well:

This is where the accelerometer is.
Accelerometers work like fuzzy dice do in cars. If you were to accelerate the car sharply, like on a freeway on ramp, the dice swing backward. If you break sharply, the dice swing forward.
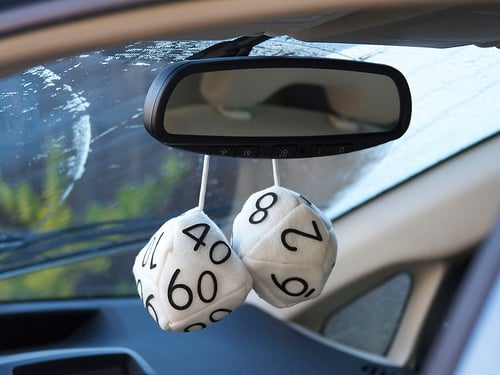
These fuzzy dice are made and photographed by Windell Oskay, and you can learn how to make them with his tutorial. This is the original link to this picture, along with its license.
As you can imagine, accelerometers are pretty cool. For this tutorial however, we’re not going to use the robot’s motion as an input, but rather use the accelerometer to detect which way “down” is.
Imagine that the car with the fuzzy dice is parked on a hill, all the windows are dark, and you were stuck inside it. If there was no hill, the dice would hang straight down as usual. However, if the car was on a hill, the dice would seem to hang to one side or another depending on the slope. You could tell how steep the hill is by looking at the angle of the fuzzy dice. The direction the dice tilted would point down the hill.
We’re going to use the same exact idea to help Sparki figure out what kind of slope it has been set on.
Since we want Sparki to get to the top of the hill, we can have Sparki turn so it is facing either up the hill or down the hill, and have it move forward or backward respectively. Looping this behavior should produce code that sends Sparki to the top of the hill it is on!
Understanding Sparki’s Accelerometer
The accelerometer on Sparki expresses the accelerations for each dimension. This is a fancy way of saying it stores various kinds of accelerations in various different variables. It does this because movement is complicated. If I say you went 10 units of distance, what that means will change with what direction you went in. This is why we have pretty familiar ways of dealing with this, such as a compass rose. You’ve seen them before on maps for sure:
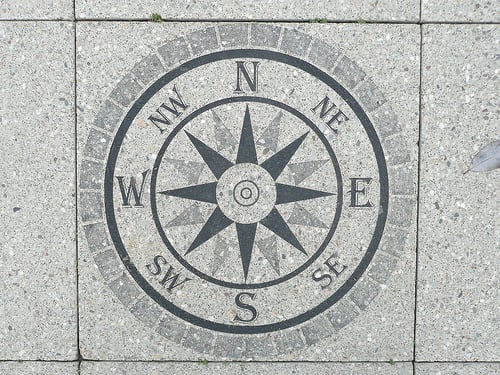 A Compass Rose at Fort McHenry National Monument in Baltimore Maryland of the United States. It was photographed by Margaret W. Carruthers. This is the original link to this picture, along with its license.
Now we can think of the movement in pretty simple terms. There is a center place and things are North, South, East or West of that. However, we know we can do better. In Euclidean geometry, something can’t be North of the center and South of the center at the same time. In fact, for every bit it is South, we could say it is a bit un-North. That’s a lot simpler for a computer to keep track of than remembering which directions are across from the other ones.
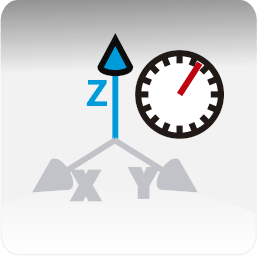
This means we can now think of everything in terms of how North (or un-North) it is and how East (or un-East) it is. Because we are using two variables to track Sparki, and because no amount of movement in one variable will ever impact what the other looks like, we say we are working in two dimensions. Scientists frequently call the first two dimensions x and y (when we have a 3rd one that is going into the screen or further out of it, that is called z):
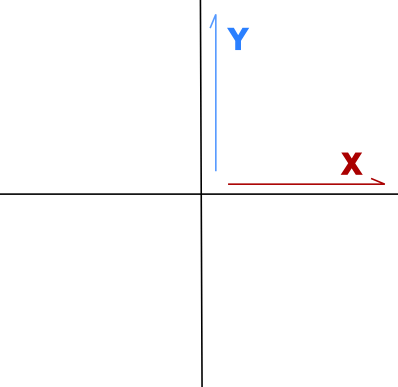
We can think of Sparki’s environment in two dimensions.
Calling things un-x is mathematically tedious though, so we just call them negative numbers instead. The bigger the number, the more un-something it is. So -1 is one step to the un-North (aka South). The bigger the negative number, the more South it is. It can seem counter-intuitive when you first see it, but this is why -1 is smaller than -.5, which is smaller than 0, which is smaller than 1:
![]()
Visual representation of how the higher a negative number is, the more negative it is. These numbers are ordered from smallest to largest.
One last tidbit. When we want to express which number is bigger when coding, we use > and < marks. An example is 1 > 0. You can imagine the > and < symbols are hungry little alligators which always are greedy and want to eat the bigger number (as it will be more filling.) You’ll see the > and < used a lot to compare numbers in our Sparki code (though other forms of programming sometimes also use it for other things). There is more information about these operators on the if-statement programming lesson (although that programming lesson has been written using SparkiDuino syntax instead of miniBloq, it should be useful too, since the principles are the same).
So now that we’ve established how we’re going to express the acceleration, we need to worry about where it comes from and what it means. Remember the car tilted on the hill with the fuzzy dice? If there were no hill, the dice would hang down like we expect them to. If the car were tilted, a person outside the car would easily see that the dice still hung straight down and that the car is tilted, but to a person inside the car, the car feels un-tilted and the dice look tilted.
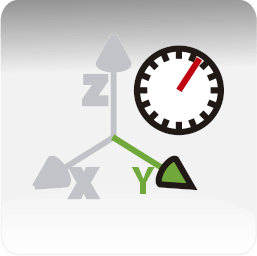
Sparki works exactly the same way. Depending on which way Sparki is tilted it will detect acceleration in different dimensions:
When Sparki is tilted like this, the Y acceleration will be positive.
When Sparki is tilted like this, the Y acceleration will be negative.
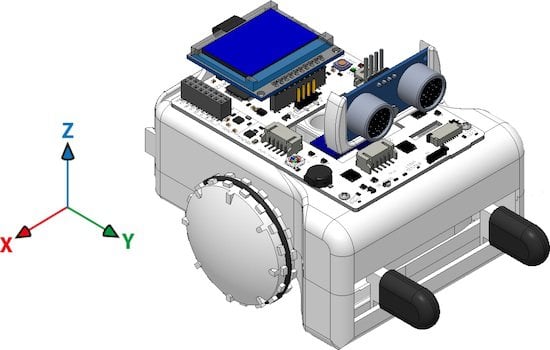
In the same way, if Sparki is tilted to its right it will output a positive X acceleration, and if it is tilted to the left, it will output a negative X acceleration. Here is a picture showing the axes as seen by the accelerometer:
For example, here are some of the accelerometer readings when you move Sparki in the Y and Z axes:

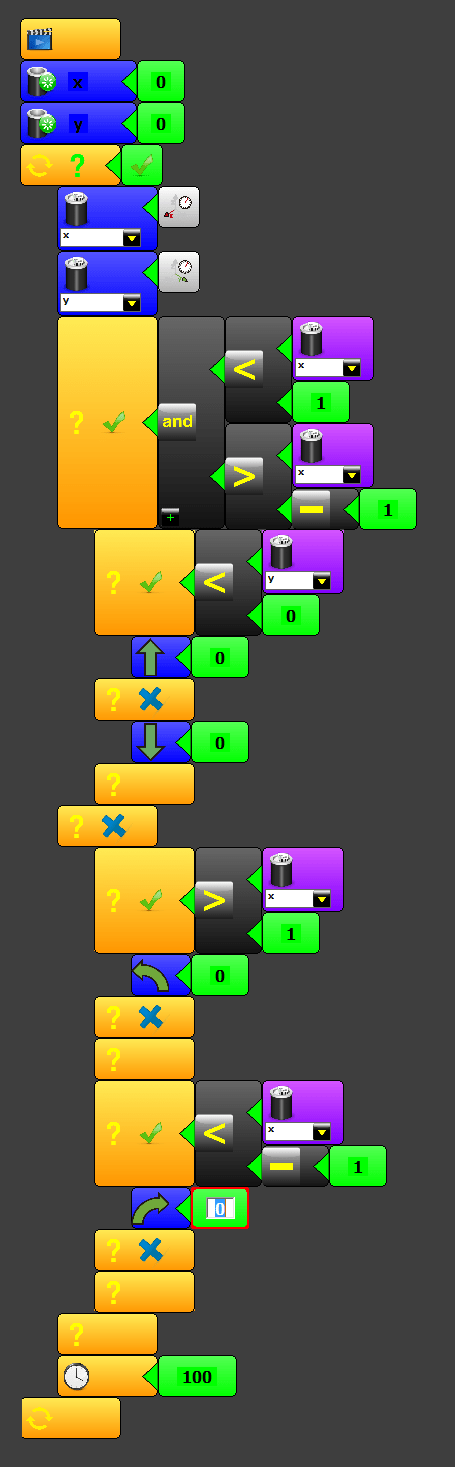
Here are the basic blocks to read the accelerometer using miniBloq:
Now that we know all that, the actual code is pretty simple! We determine if Sparki is already pointing up or down the hill, and drive it forwards or backwards respectively. If Sparki isn’t pointing up or down the hill, we turn Sparki until it is!
Programming It With Sparki
![]() Please remember to check that the batteries are properly connected (and charged!). And as we are going to use the motors here, please check that the On/Off Switch is on. Another important thing to take care of when playing with the robot’s motors is to be careful not to be working over a table. A fall from that table could permanently damage your Sparki.
Please remember to check that the batteries are properly connected (and charged!). And as we are going to use the motors here, please check that the On/Off Switch is on. Another important thing to take care of when playing with the robot’s motors is to be careful not to be working over a table. A fall from that table could permanently damage your Sparki.
As you can see in the following program, the accelerometer readings are stored in two variables (called x and y in our program), since we will be using these values more than once along the program.
Finally, please note the presence of a delay block (similar to the delay command when using SparkiDuino software), which is necessary to give Sparki enough time to respond to the moving commands between iterations of the main loop:

Congrats! You just programmed Sparki to climb a hill!
Extra Activities
Remember that Sparki will just go to the top of the hill it is already on. If there is a bigger hill someplace else, it can’t see it! Can you think of a way for Sparki to figure out if it is on the highest hill or if there is another one?
Related Lessons
If you have enjoyed working with the accelerometer, you may find another interesting usage for it in the Making Music with the Accelerometer lesson.