


Arrays
A Bunch of Variables All Linked Together
Lessons You Should Know

Arrays are groups of variables, one after another.
Here’s what we’ll be covering on this page:
You can use any variable type for your array. If we think about our example of variables being like containers then arrays of our three different variable types might look like this-

Declaring an Array
When you declare an array, you must declare both its variable type and size:
char charArray[6]; // an array named charArray with six spaces to hold info
The code above would create an array of 6 variables, all of which are characters. When you declare an array like this the variables inside the array are all empty. If you want to declare an array with values already in it, you should declare every value inside of it. You don’t really need to, Sparki will put null values (you’ll learn about this in a second) inside the variables for which you don’t give values.
char charArray[6] = {'h','e','l','l','o','!'};
//or
int intArray[6] = {1, 2, 3, 4, 5, 6, 7);
As you can see the quotation marks are specific to an array of character variables, but the curly brackets and commas are important and needed any time you declare an array with values.
You can also have as many variables in the array as you like. (As long as your computer can store that much.)

You can only declare an array to hold one type of variable. You cannot have an array of multiple variables types:

Accessing Information Inside the Array
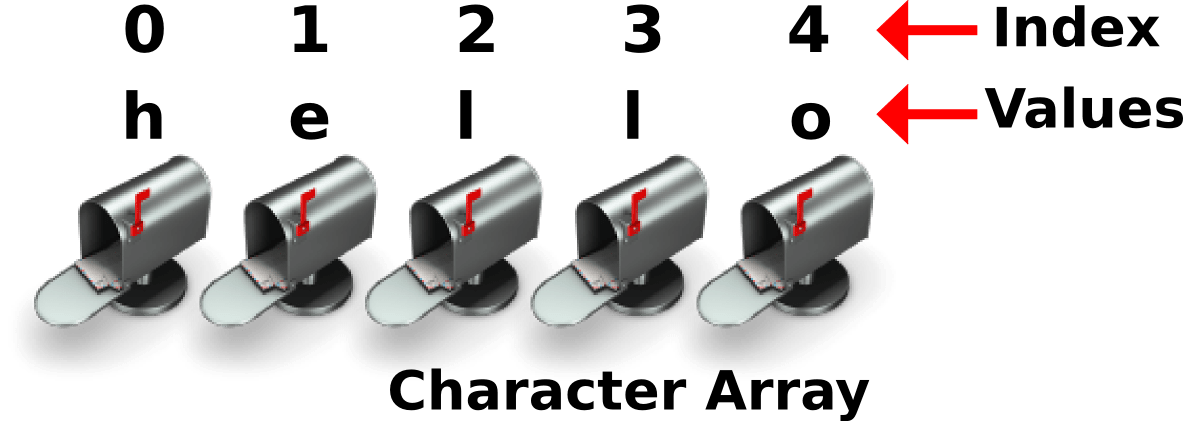
Once you declare an array, you can access any variable inside of it by using that variable’s index. An index is which place the variable is in the array. Remember: counting with programming starts with 0, so when you access the first item, use the index number 0. The second item would be 1, the third would be 2, and so on.
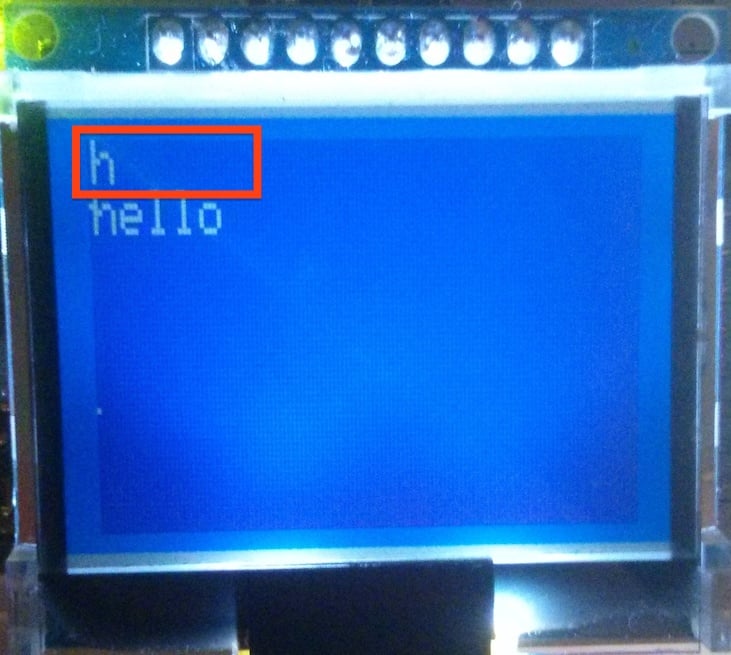
This means that running this code:
sparki.println( charArray[0] );
Results in:
But what if we just want to print the whole character array at once? When we try:
sparki.println(charArray);
We get this:
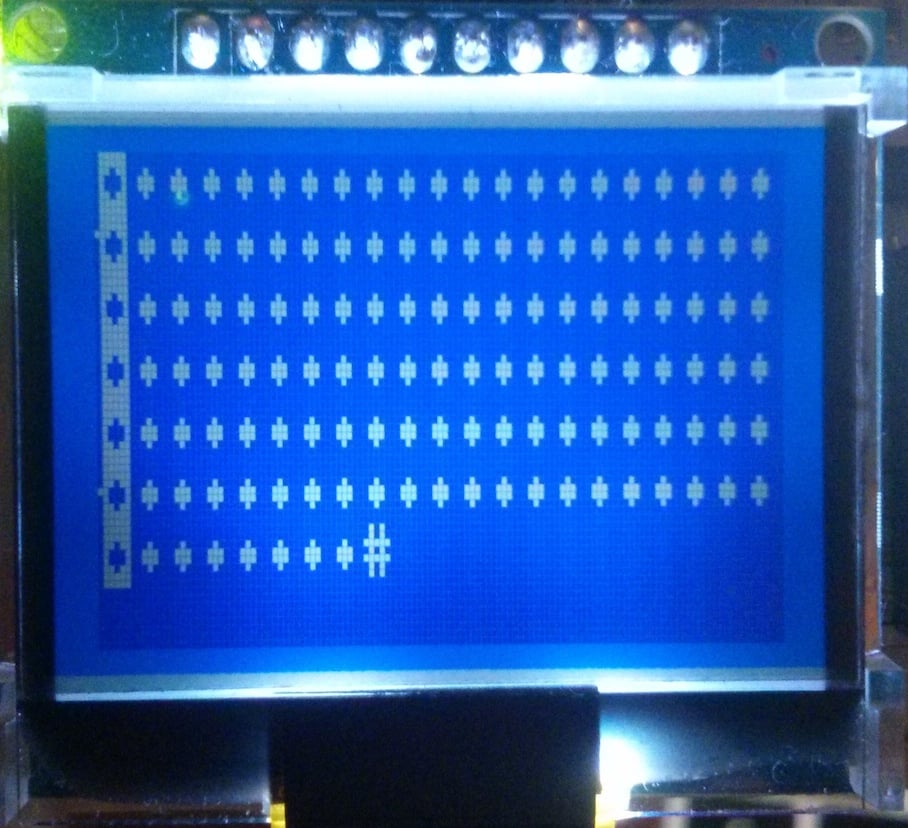
Whoah! What happend there!? That’s not “hello!”.
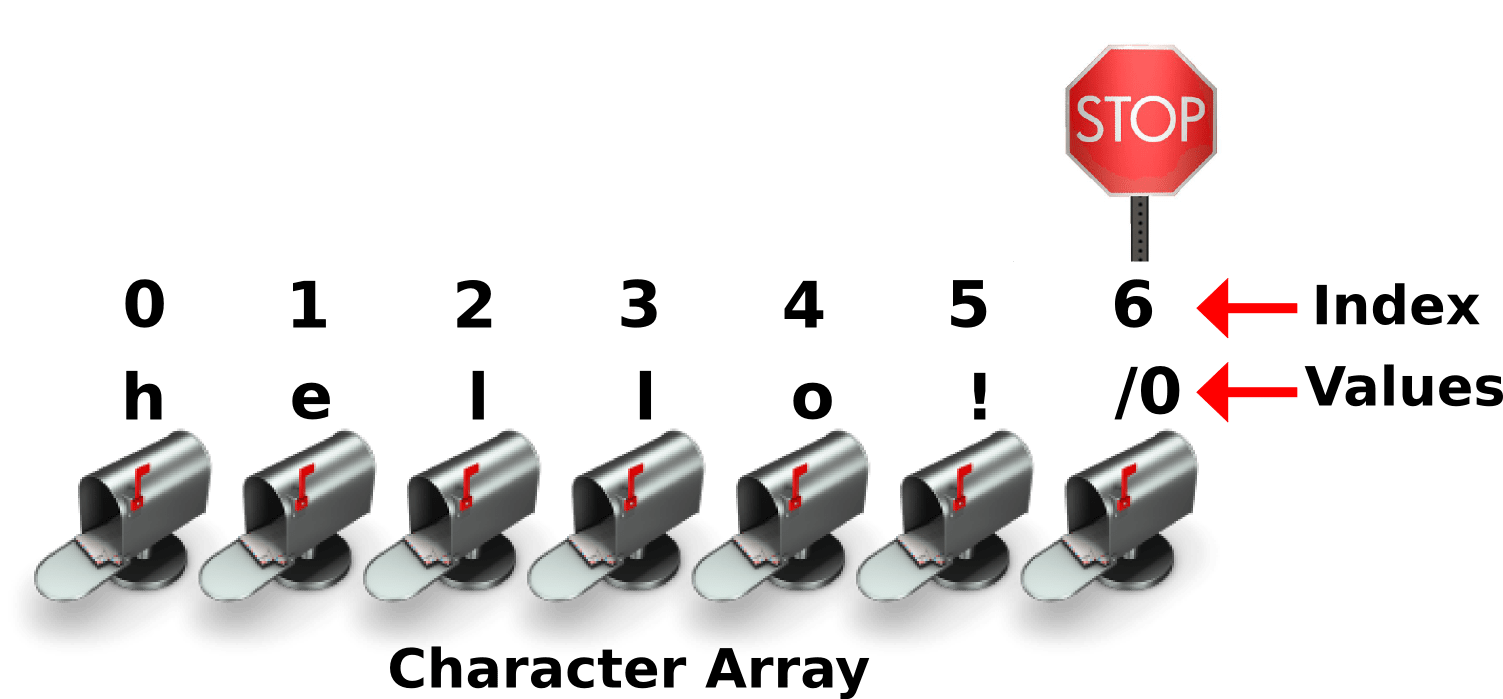
The computer doesn’t know the array has 5 values, because there is nothing telling it to stop. Even though we created it with 6 places, the computer doesn’t know that once it’s created. We need to give the computer directions on when to stop. We do this via a special character called the null character. It is is represented as a backslash followed by a zero: ”
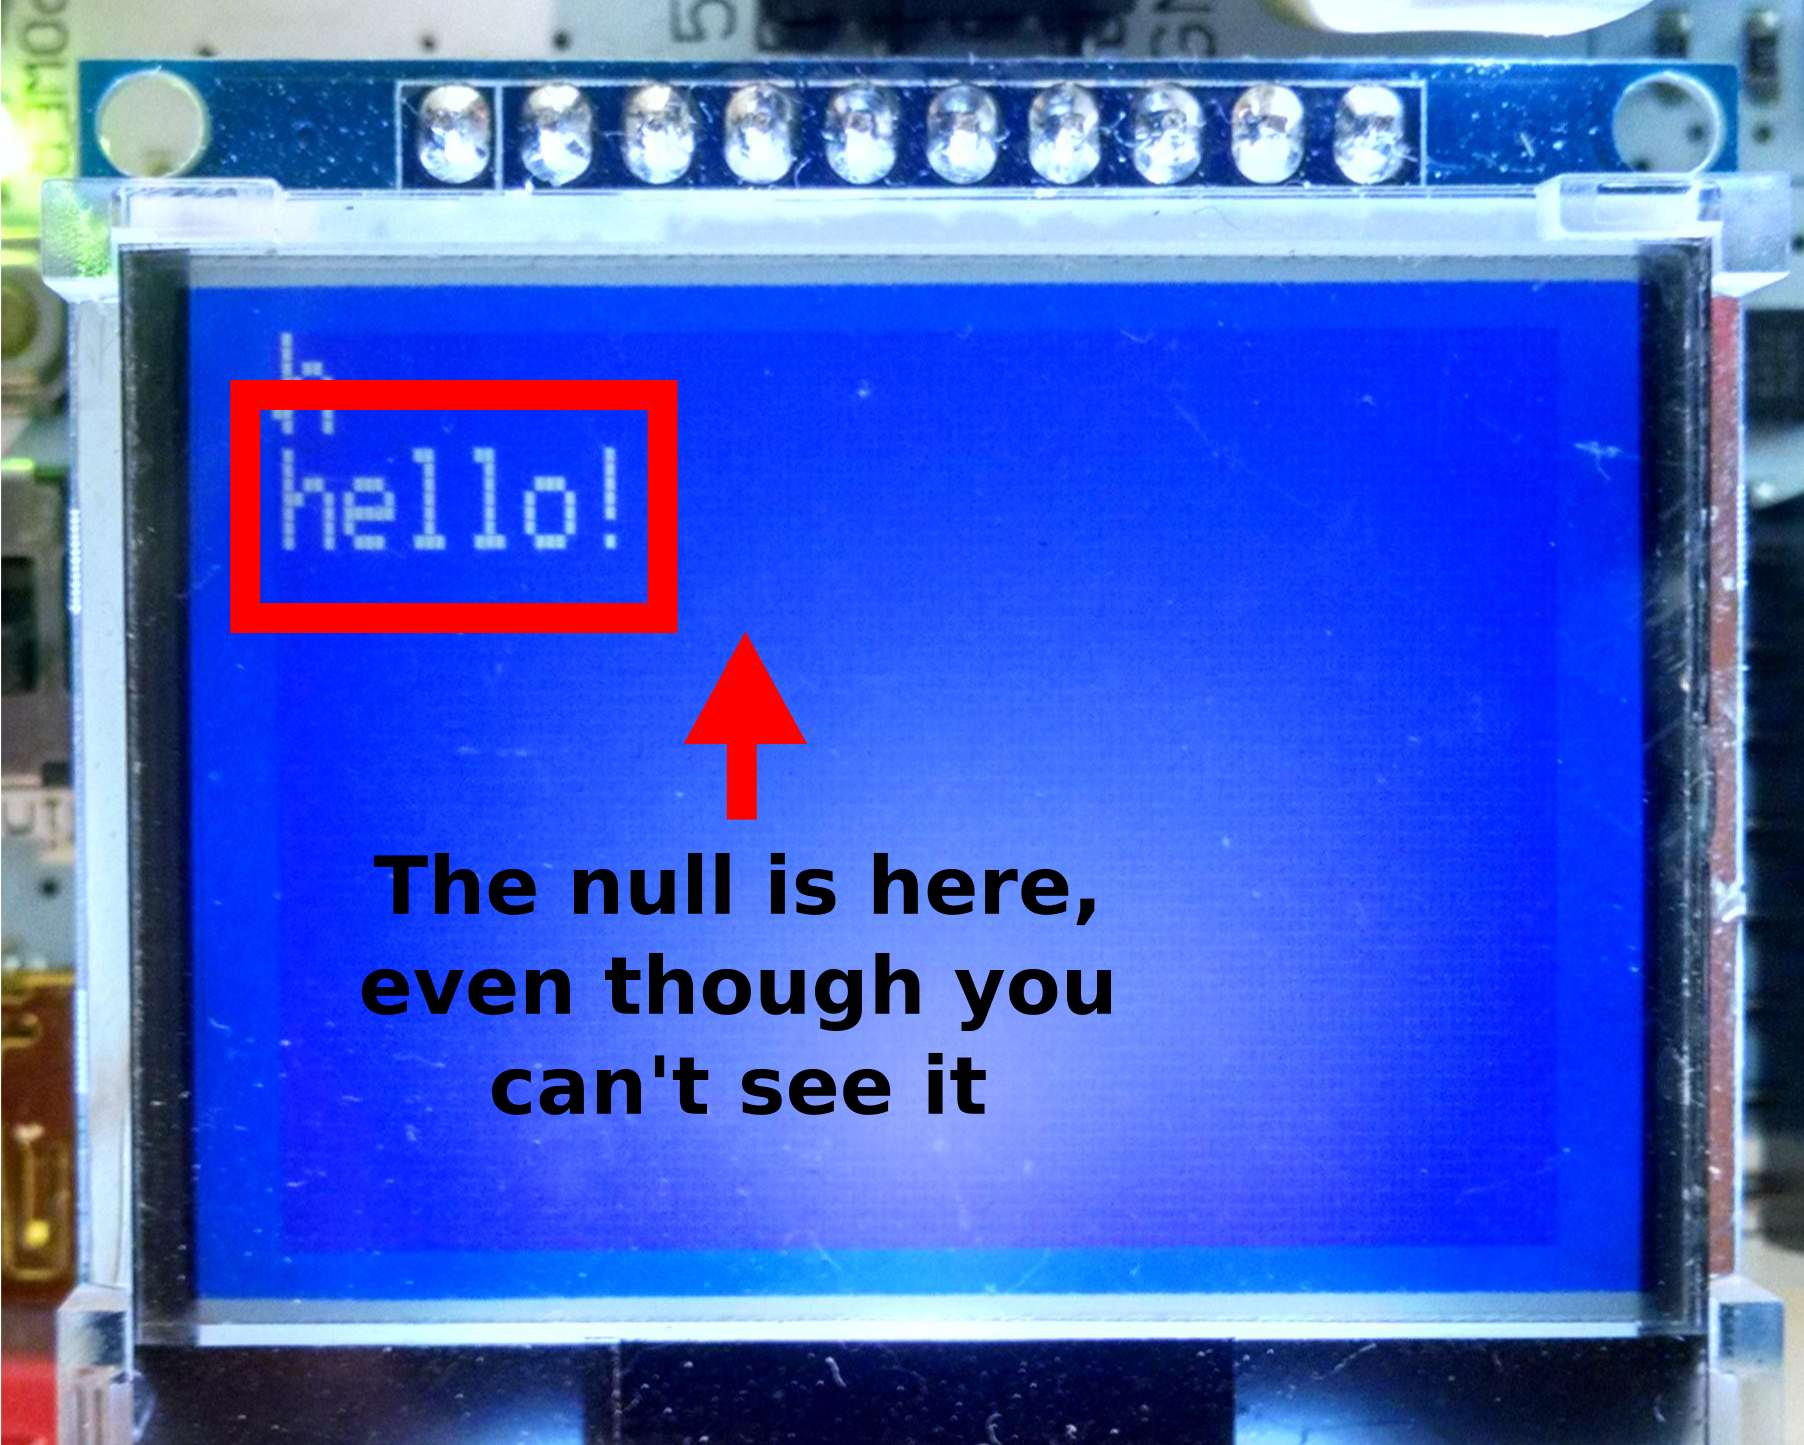
Modify the array so it ends with a null character, then we can print it:
charArray[6] = '';
sparki.println( charArray );
Now Sparki can print out the whole array, knowing where to end:
Here is all the code at once:
#include <Sparki.h> // include the sparki library

void setup() // code inside these brackets runs first, and only once
{

}

void loop() // code inside these brackets runs over and over forever
{
   sparki.clearLCD(); // clear the LCD

   char charArray[6] = {'h','e','l','l','o','!'};

   sparki.println( charArray[0] ); // print the first item in array

   //sparki.println( charArray ); // try to print the array

   charArray[6] = ''; // put an end in the array

   sparki.println( charArray ); // print the array with an end

   sparki.updateLCD(); // draw new info on LCD
}

Searching Through Arrays
Another common way you will see programmers poking around inside arrays is with “for” loops. Often programmers will use this type of code to search through an array looking for a certain value. We won’t cover “for” loops in this lesson but it’s important that you see this kind of code and get a little more comfortable with it. If you’re feeling overwhelmed by arrays already feel free to skip this portion of the code.
#include <Sparki.h> // include the sparki library

char foundLetter; // variable to hold the letter we are looking for

void setup() // code inside these brackets runs first, and only once
{

}

void loop() // code inside these brackets runs over and over forever
{
 sparki.clearLCD(); // clear the LCD

 char charArray[6] = {'h','e','l','l','o','!'};

 charArray[6] = ''; // put an end in the array (in a new variable)

 sparki.println( charArray ); // print the array with an end

//Start of code that looks through the array
 for(int i = 0; i <= 7; i++) // this line looks through all seven values of the array
  {
  if(charArray[i] == 'l' || charArray[i] == 'L')
  // asks the question- is this value one of the letters we are looking for?
   {
   foundLetter = charArray[i]; // store the letter
   sparki.println(i); // print the index number of the letter we found
   i = 8; //skip to the end of for loop
  }
 }
//End of code that looks through the array

 sparki.println(foundLetter);

 sparki.updateLCD(); // draw new info on LCD
}
The code above uses the for loop to search through all eight of the variables (remember, arrays start counting at zero so even though the for loop only goes up to seven, it really checks eight variables) in charArry.
At each variable in the array the “if” statement inside of the for loop checks to see if the value of the variable is equal to either an upper case or lower ‘L’. If Sparki finds an ‘L’ or an ‘l’ then the character is stored in the variable foundLetter and the current index number position is printed out with the command sparki.println(i);.
if(charArray[i] == 'l' || charArray[i] == 'L')
  // asks the question- is this value one of the letters we are looking for?
   {
   foundLetter = charArray[i]; // store the letter
   sparki.println(i); // print the index number of the letter we found
After that the variable ‘i’ is set to eight which causes the for loop to skip to the very end of the array and stop checking letters. The only thing left after that is to use the sparki.println(foundLetter); command to display the letter we found.
If you want to play around and search for different letters all you have to do is change the letters in the if statement-
if(charArray[i] == 'l' || charArray[i] == 'L') // change l and L to whatever you want
Feel free to try entering different values into charArray and this if statement. Mess around with the code, if you really foul it up you can always re-upload the original code!
Recap of What We’ve Covered So Far
or
Next Step:
Now that we know what variables are, let’s see what you can do with them:
Next Lesson – Functions