Servotor32 Serial Commands
The Servotor32 can be connected to your computer either by USB or Bluetooth. Both of these connections act as an old-style
serial port, (by default 9600N1). The advantage of this format is that
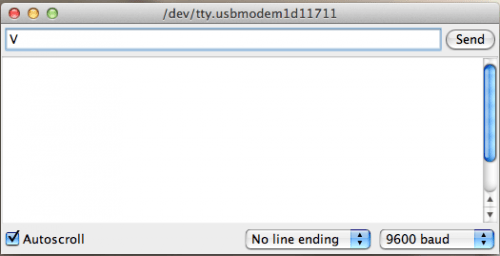
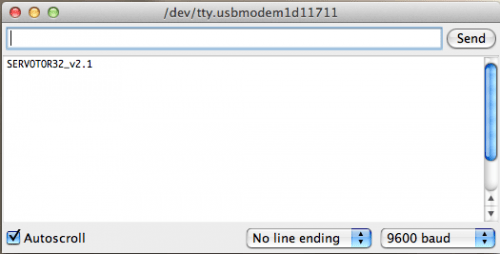
it is very easy to send commands back and forth using a terminal, like the one included with the Arduino software, like so:
By default, the Servotor32 comes pre-loaded with software to work with PoMoCo. Here are some of the commands you can send to
Servotor32 using its default firmware.
Note: Where convenient, we attempt to stick to the convention of the ever-popular SSC32 (although we don’t
guarantee compatibility), while adding to it. In that vein, all letters are non-case sensitive, and ‘enter’ can be
interpreted as either carriage return (r) or newline (n).
Move a servo (all versions)
Move a servo by typing:
#<Servo Number>P<Position Number> <Press Enter>
Position number is in microseconds (uS). Centered is 1500uS, while -90deg is 500uS, and +90deg is 2500uS. More detail on
how servo timings work is available
here.
For example, to move the servo on the pin labeled 0 to center would be:
#0P1500 <Press Enter>
Kill individual servo
(
all versions
)
This makes the servo in question go limp. Great for saving power, or when you just want it to stop moving
#<Servo Number>L
For example, to make servo 5 stop moving:
#5L <Press Enter>
Kill all servos
(
all versions
)
This kills all 32 servos at once. This is good if you just want the thing to stop immediately. One use case would be if it
its hurting itself or getting jerked around and you want it to stop moving, or if you just don’t want to type kill for every
servo.
K <Press Enter>
Center all servos
(
all versions
)
Move all 32 servos to 1500uS (i.e. centered)
C <Press Enter>
Check the Firmware Version (all versions)
You can check which version of the firmware the board is running by opening the arduino serial terminal and typing ‘V’
and pressing enter (without the quotation marks) like so:
V <Press Enter>
This command is used by PoMoCo to identify the board.
Debug (2.0 and above)
This gives off all the nitty-gritty information about the status of all the servos.
D <Press Enter>
Set Pin (2.01 and above)
Configures the pins on the Servotor32
The command is:
S<pin designator><pin option>\n
Pin designators are two-characters, and follow their arduino descriptions as best as possible. The available options available are:
00 or RX
01 or TX
02 aka SDA
03 aka SCL
05
06 or A7
07
09 or A9
10 or A8
11 aka ultrasonic echo pin
12 aka A11
13
17 or RL aka ultrasonic trig pin, in arduino as RXLED
22 or A4
23 or A5
Pin Options are:
H – Pin is set high
L – Pin is set low
Examples:
set pin 3 high:
S03H\n
Set pin A6 low:
SA6L\n
Ultrasonic (2.1 and above)
This command asks the Servotor to take 1 or more measurements with the ultrasonic, and to report back the median of the
measurements.
U<Number of measurements> <Press Enter>
For example, if you wanted to return the average of 5 measurents, you would send:
U5 <Press Enter>
The measurement in centimeters would be returned in ASCII plaintext, followed by a newline (aka enter) character:
25
Set Offset (2.1 and above)
This command adds an offset to a servo in uS. By default, the offsets are all 0. This offset is saved in the EEPROM of the
board, meaning it will stay even if it is the board is unpowered. The values in the EEPROM are loaded into RAM by default when
the board boots up. When the offset is changed, both the EEPROM and RAM versions are changed. You can erase the offset again by
setting it to zero.
#<Servo Number> O <Offset Value> <Press Enter>
For example, if you wanted to add a positive offset of +100uS to servo 3, you would send:
#3PO100 <Press Enter>
This command also accepts negative offsets, so for an offset of -300uS on servo 5, you would send:
#5PO-300<Press Enter>
Binary mode servo move (2.1 and above)
This command sends the board into a special binary mode that lets software such as PoMoCo send commands much faster than
other methods. As such, it is a bit more complicated than the usual commands. The format is defined as:
$<4 byte mask><N byte send>
The command starts the the ASCII character for ‘$’ (ox24 in hex). The next 4 bytes that are read are interpreted to tell
which servos are going to be instructed to move. For example, if the next 4 bytes were 0x00,0x00,0x00,0x01, only servo 0 would
be moved, and it would only expect 1 byte before returning to ‘non-binary’ mode. The byte to follow would then tell the
position in terms of 50 to 250 (in hex, as an unsigned byte).
If the command were only moving servo 0 to 1500uS, the total information for this command would be 6 bytes total (in
hex):
0x24,
0x00,0x00,0x00,0x01,
0x96
Likewise, if all 32 servos were to be moved to center, it would be a total of 37 bytes (1 start, 4 mask, 32 position) and
look like this:
0x24,
0xFF,0xFF,0xFF0xFF,
0x96,0x96,0x96,0x96,0x96,0x96,0x96,0x96,0x96,0x96,0x96,0x96,0x96,0x96,0x96,0x96,0x96,0x96,0x96,0x96,0x96,0x96,0x96,0x96,0x96,0x96,0x96,0x96,0x96,0x96,0x96,0x96
No enter is necessary, as the command automatically knows how long it is by means of the mask.
Thanks to Michael for coming up with the original idea and implementation of a binary mode.


