Recap of Basic Code & Syntax
What We’ve Covered So Far
Comments:
Comments are created using two slashes // for one line of comments and /* */ for multiple lines of comment. They don’t effect code and they are there mainly to help people who are writing or using code. Comments can also be used to stop code from effecting your robot’s actions without visibly removing the code from your program.
// this is a comment

/*
this is also a comment
*/
Including a Library:
Libraries are large sections of code that can be imported. Then coders can access functions inside that library to make programming easier. All Sparki projects should have the sparki library imported. Here’s an example of importing a library-
#include <Sparki.h> // include the sparki library
Here’s an example of using the move forward function from the sparki library-
sparki.moveForward();
Setup: Before entering the loop function Sparki will execute the code inside of the setup function exactly once. The setup function is used to do things like calibrate sensors, start communication and anything else you want to have happen only once.
Loop:
Robots work by executing code over and over again. Any code you write inside of the loop function will repeat over and over until the robot runs out of batteries or is turned off. Every single Sparki program needs a loop function.
Semicolons:
Semicolons are at the end of every line of code which tells Sparki to complete an action of some sort. They or sort of like a period that indicates Sparki has all the information necessary to do something and can start moving around one and zeros, reading sensors, blinking LEDs and turning motors.
Parentheses:
Parentheses are used to either ask questions or pass information. Parentheses come in pairs, any time you see an open parenthesis ( you will later see a closed parenthesis ). Sometimes you will see parentheses inside of parentheses, these are called nested parentheses.
Curly brackets:
Curly brackets are used to contain sections of code that pertain to each other. Curly brackets help the computer know which parts of the code it needs to execute and which parts of the code it will skip. Curly brackets come in pairs, any time you see an open curly bracket { you will later see a closed curly bracket }. Sometimes you will see curly brackets inside of curly brackets, these are called nested curly brackets. You will most often see curly brackets in functions, questions and looping code.
void setup() // example of setup function
{
// this is an empty setup function but it is still necessary
}

void loop()  // example of a loop function
{ // this is the first curly bracket that tells the robot to
  // execute the code inside these curly brackets
if( movement == true ) //here are some parentheses asking if
                       //the variable movement is equal to true
 { // first nested bracket (inside of loop brackets)
 sparki.moveForward( 30 ); // here's a semicolon and parentheses
                           // passing a value of 30
 } // closing nested curly backet (inside of loop brackets)
} // this is the closing curly bracket that tell the robot
  // the loop section of code is done and it should go back to the top
Question and Activities to Try
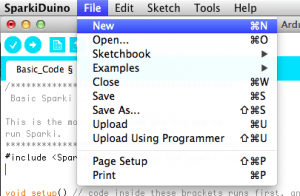
1. Just write the basic parts of a Sparki program from scratch. To create an empty file go to the File menu, click once and move the cursor down to select New. You can also hold down the press the Command (Control key on a PC) and ‘N’ key at the same time to use a shortcut. When creating your empty program include a library, the setup function and the loop function. Make sure to include all the important parentheses and curly brackets.
2. Next try adding movement commands inside of the loop function. The movement commands all come from inside the sparki library so they will all start with “sparki.” followed by each movement command. Here’s an example of a forward movement command-
sparki.moveForward();
More information about movement commands for Sparki can be found here.
3. Now try passing a number to your various movement commands by typing a number inside the parentheses at the end of the commands. See how each number effects different commands and Sparki’s movement. Here’s an example of a movement command that will make Sparki move ten centimeters-
sparki.moveForward(10);
4. Practice matching up curly brackets by doing the following exercise- Open any example code for Sparki. First use your left hand to count the total number of open curly brackets { and use your right hand to count the total number of closed curly brackets }. The two numbers should match up if the code is functional code.
Where to find example code for Sparki
5. Nested curly brackets means that the computer has to have a “true” answer to multiple questions, one inside another in order to get to code that is in nested curly brackets. This means that the nested curly brackets are a couple of levels deep in logical terms. For example-
void loop()
{ // this is the first curly bracket that tells the robot to
  // execute the code inside these curly brackets
if( movement == true ) // this is the first question the robot
                       // asks itself
 { // first nested bracket (inside of loop brackets)
 sparki.moveForward( 30 ); // this code is two logical layers deep
                           // because there are two open curly brackets
                           // that the computer needs to go inside of
                           // in order to get to this code
 if( sensors == true ) // this is the second question the robot
                       // asks itself but it an only get here if
                       // the answer to the first question was "yes"
  { // second nested bracket (inside of loop & movement question brackets)
  sparki.moveBackward( 30 ); //this code is three logical layers deep
  } // closing second nested bracket
 } // closing first nested curly backet (inside of loop brackets)
} // this is the closing curly bracket that tell the robot
  // the loop section of code is done and it should go back to the top
Now try counting the depth of nested brackets in the some example code by doing the following exercise- Count the opening brackets { on your hands using your fingers. Any time you see a closing bracket } remove one from the total count you are keeping on your hands. Any time you get above two logical layers deep make sure you can identify the questions, functions or loops that need to be answered “true” in order to get Sparki to that logical depth. Hint- it won’t always be the last opened curly brackets that got you to the logical depth that go you to where you are currently. Also, don’t worry if you can’t understand some (or a lot) of the code other than the curly brackets, you’ll get there eventually. Here’s an example-
void loop()
{ // one logical layer deep
 if ( movement == true )
 { // two logical layers deep
   // loop and if movement got us here
 } // back to one logical layer deep
 if ( sensors == true )
 { // two logical layers deep
   // loop and if sensors got us here
  for( int i = 0; i <= 10; i++ )
  { // three logical layers deep
    // loop, if sensors and for int i got us here
  } // back to two logical layers deep
 } // back to one logical layer deep
} // end of loop
Next Step:
If you’ve made it through this far you’ve definitely got what it takes to learn how to code! Keep going and learn about how to use information next, after all- information is power.


